
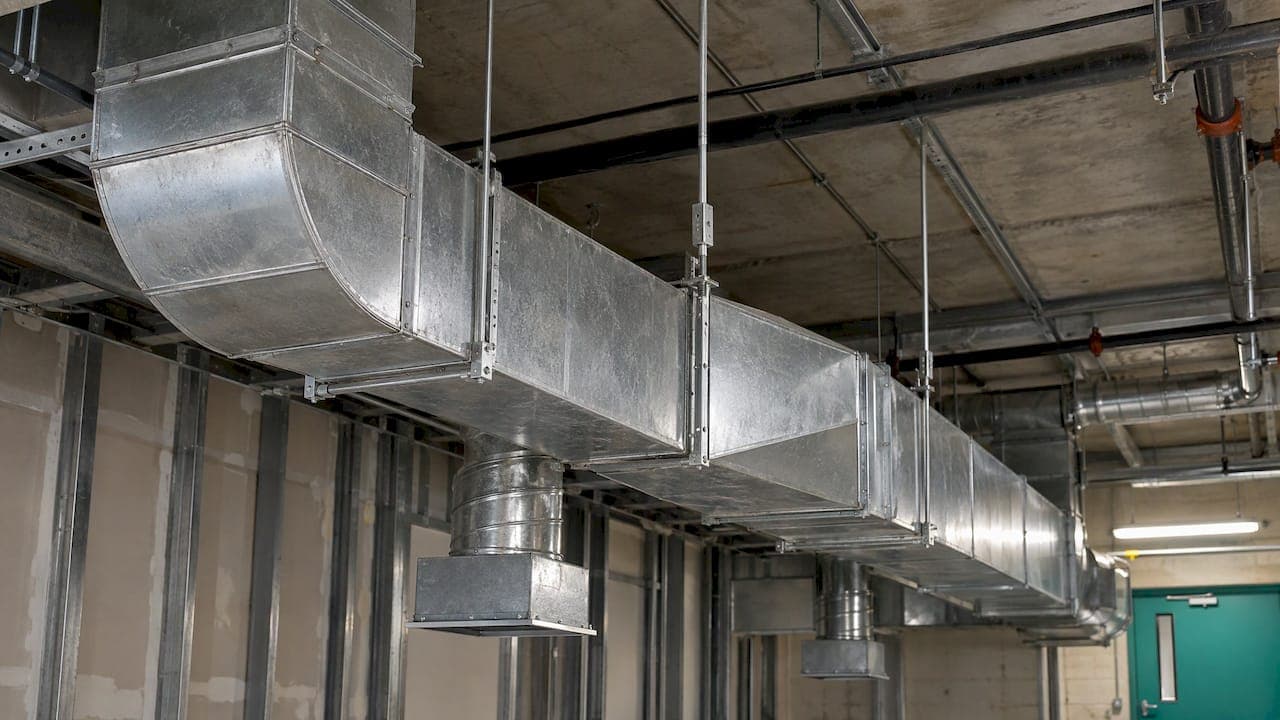
An HVAC duct takeoff is a count and measurement of every piece of ductwork on the mechanical drawings, so you can price material, shop labor and field labor. Measure straight duct in linear feet by size and gauge, convert it to square feet and pounds, count every fitting and accessory one by one, then add liner, hangers, sealing and testing. This guide walks through that order, with the math, the numbers and the checks that keep you from bidding low.
TL;DR
- A full duct takeoff covers straight duct, fittings, liner or wrap, accessories, air devices, equipment, supports, sealing and testing. The first two drive most of the cost. The last few are where margin leaks.
- Rectangular duct area is 2 × (width + height in inches) ÷ 12 × length in feet. Round duct is 3.1416 × diameter ÷ 12 × length. Gauge decides weight, and weight decides price.
- Count fittings and dampers individually. A percentage allowance is too low in a tight mechanical room and too high on a long straight run.
- Add a waste factor, write down assumptions, and have a second person check the sheets before the number goes out.
Table of Contents
- What a duct takeoff includes
- Before you measure: what to pull from the bid set
- How to measure straight duct
- How to count fittings, dampers and hangers
- Check your numbers before they go out
- Turn quantities into a bid
- Manual, PDF or software: how to take off faster
- Our perspective
- Takeoff tools for HVAC subs
- FAQ
- Sources
What a duct takeoff includes
The word "duct" undersells the job. A duct takeoff is a review of the mechanical drawings that quantifies the whole duct system: rectangular, round, spiral and flexible duct, fittings, dampers and access doors, grilles, registers, diffusers and louvers, insulation and lining, supports, flexible connectors, sealants, fasteners and any demolition scope.
One useful way to organize it is nine buckets:
| Bucket | What you capture | Unit |
|---|---|---|
| Straight duct | Size, gauge, material, pressure class | Linear feet, then SF and lb |
| Fittings | Elbows, tees, transitions, offsets, taps, end caps, boots | Each |
| Liner and wrap | Thickness and R-value | Square feet |
| Accessories | Volume, fire and smoke dampers, access doors | Each |
| Air devices | Supply diffusers, return and exhaust grilles | Each |
| Equipment | AHUs, RTUs, VAV boxes, fan coils, exhaust fans | Each |
| Support | Hanger rods, straps, trapeze steel, seismic bracing | Each or LF |
| Sealing | Mastic, tape, gaskets by seal class | Gallons, rolls or SF |
| Testing | Leakage test scope, test and balance scope | Lump sum or hours |
That list follows the nine-category breakdown used in published takeoff guides. Straight duct and fittings carry most of the dollars. Accessories, supports, sealing and testing are where estimators most often lose margin.
A note on scope: a commercial HVAC takeoff usually splits into sheet metal (airside), piping (waterside) and equipment. This article covers the airside sheet metal and its related parts.
Before you measure: what to pull from the bid set
Do not start clicking on the first duct run you see. Read first. Before measuring, review:
- Mechanical plans showing duct layout, sizes and air devices.
- Duct, equipment and air-device schedules.
- Details and legends for fittings, dampers, access doors and connections.
- Specifications covering materials, gauges, pressure classes, sealing, insulation and testing.
- Architectural reflected ceiling plans and structural sheets, so you know what the duct has to fit around.
- Every addendum.
Those are the items an estimating guide lists as the pre-takeoff review. The Wendes Mechanical Estimating Manual adds a habit worth stealing: study the plans and specs, then mark and color the drawings to separate the different types of duct runs, and locate alternates and addendum areas that need labor adjustments.
A simple color scheme works. Supply in one color, return in another, exhaust in a third, and a fourth for anything that is alternate or revised. When you open the sheet a week later, you can see what you already counted.
Read the notes and the "by others" lines
Plenty of takeoff misses hide in general notes, "by others" callouts and owner-furnished items. A grille that someone else buys still needs someone to hang it. Write each of these down as either included or excluded. Guides on MEP takeoffs point to notes, owner-furnished items and revision drift as common sources of misses.
How to measure straight duct
Measure straight duct in linear feet along the centerline, by size, shape and gauge. Flexible duct goes in linear feet by diameter. Then convert to surface area, because sheet metal is bought and priced by area and weight.
The formulas, as published in an estimating guide:
- Rectangular: 2 × (width + height in inches) ÷ 12 × length in feet = square feet.
- Round: 3.1416 × diameter in inches ÷ 12 × length in feet = square feet.
- Weight: surface area × the weight per square foot for the gauge.
These formulas cover straight duct only. Seams, fittings, waste and fabrication allowances are handled separately.
Worked example: rectangular supply main
Say a supply main is 24 in. × 12 in. and runs 150 LF.
- 2 × (24 + 12) = 72 inches of perimeter.
- 72 ÷ 12 = 6 SF per linear foot.
- 6 × 150 = 900 SF of sheet metal.
Now apply your gauge table. For illustration, if your table gives 0.70 lb per SF for that gauge, 900 SF comes to 630 lb. Use the weight from the SMACNA-based table your shop actually fabricates to, not this number.
Worked example: round branch
A 12 in. round branch runs 100 LF.
- 3.1416 × 12 ÷ 12 = 3.1416 SF per linear foot.
- 3.1416 × 100 = about 314 SF.
Spiral and flat oval follow the same logic. Record them as separate lines, since they price differently.
Gauge is a pricing decision, not a detail
Gauge depends on the pressure class and the duct's largest dimension, and the spec tells you which applies. Because fabrication and install labor are often priced per pound, a wrong gauge moves both material and labor. One published example puts the swing from picking the wrong pressure class at $7,000 to $10,000 on raw material over a 6,000 SF run. Read the pressure class on the spec and the drawing, and when they disagree, write an RFI.
How to count fittings, dampers and hangers
Fittings are where a duct takeoff gets honest. Elbows, transitions, offsets, taps, tees and end caps cost far more per pound to make and hang than straight duct. Count each one by type, size and angle. Do not add a flat percentage to the footage.

The reason is simple. A percentage allowance runs systematically low on a tight mechanical room or a coordinated ceiling and high on a long straight run. Skipping fittings is one of the most common reasons a bid comes in too low.
A sample takeoff
Here is a sample from a published guide, a commercial office building:
| Item | Quantity |
|---|---|
| 24" × 12" rectangular supply duct, 26 ga | 150 LF |
| Elbows | 8 |
| Transitions | 4 |
| Volume dampers | 4 |
| External insulation, 1.5" | 2,000 SF |
| Hangers at about 10 ft spacing | About 30 |
The source of that sample takeoff uses it to show how the extras pile up beyond straight footage. Notice that the insulation line alone is more than twice the duct surface area in our 900 SF example. That is why liner and wrap get their own line.
Dampers and access doors
Count dampers and access panels from the drawings, separate from the sheet metal. Fire and smoke dampers deserve special care. Find them on the life-safety plan and match each to its rated wall or floor assembly. Each one usually brings a sleeve and an access door, so that is three items per location, referenced to the wall type. The most common costly miss, according to one estimating firm's takeoff guide, is leaving volume dampers, access doors and test-and-balance taps out of the fitting count.
Hangers and supports
Hanger spacing comes from the SMACNA table for the duct size. As one published example puts it, a 48-inch duct needs hangers every 4 ft, while a 12-inch duct can go 8 ft on center, and seismic restraints are added where the jurisdiction requires them. Take the spacing from the table the spec calls out, then count from the run length. Do not guess a number per floor.
Check your numbers before they go out
A takeoff is a long list of small decisions. Errors come in two flavors: missed items and double-counted items.
Missed items. Typical culprits are notes, "by others" lines, revision drift and unit mismatches. Reconcile your totals against the schedules. If the schedule lists 22 VAV boxes, your takeoff should show 22.
Double counts. Duplicate counts add an average of 3% to 7% on multi-floor projects when nobody does a dedicated duplicate-check pass. The same guide recommends unique identifiers, quantity reconciliation by floor and zone, and a second-person review.
A practical check routine:
- Confirm you have the full drawing set and the latest addenda.
- Cross-check schedules against plan counts.
- Tag each counted item so it cannot be counted twice across views or floors.
- Total by floor and zone, then look for outliers against jobs you have bid before.
- Have someone else review the sheet cold.
- Write down trade boundaries and assumptions.
If you are a one-person estimating shop, step 5 can be you after a night's sleep. It still works better than nothing.
Turn quantities into a bid
Quantities are not a price. They feed a structure. One cost-calculation outline runs like this:
- Total duct weight by gauge, with a fitting allowance.
- Fabrication price per pound.
- Insulation or liner by the square foot.
- Hangers and supports.
- Dampers and air devices.
- Field installation labor, adjusted for height and access.
- Sealing and leak testing.
- Overhead, risk and profit.
For labor, the Wendes manual says estimating ductwork by the piece is the most accurate and clearest method. You list duct size, type, fitting counts and straight lengths, total the footage per line, multiply by weight per running foot for material, and use labor hours per piece for shop and field.
Keep the detail
Build a bill of materials with a description, system, size, gauge, quantity, unit, material, drawing reference and notes. Keep the detail instead of collapsing everything to one total. When a GC asks why your number moved after an addendum, you can show exactly which lines changed. For more on this, see our HVAC estimating workflow.
Waste, assumptions and exclusions
A waste factor of 5% to 10% is typical for cutting and scrap, depending on fitting count and layout, per one estimating guide. That guide also recommends an escalation clause for volatile materials and coordination notes with other trades. Put these on the bid:
- Gauge and pressure class assumed.
- Waste percentage.
- What is excluded (balancing, controls, owner-furnished items, demolition, as applicable).
- Addenda acknowledged by number.
- Access and height assumptions behind your labor rates.
If the GC leans on you in a bid review, a clear assumptions list is your best protection.
Manual, PDF or software: how to take off faster
The math above is the same whether you use a scale ruler, a PDF viewer or takeoff software. What changes is how much time you spend measuring and how easy it is to recount.
With a PDF takeoff, you set the scale on each sheet, trace duct runs by size, drop counts for fittings and devices, and let the totals roll up. When an addendum arrives, you update the affected sheets instead of starting over. The same approach works in other trades; our posts on electrical takeoff from PDF and plumbing takeoff from PDF show the method.
Two habits matter more than the tool:
- Name your takeoff items the same way every time (for example, "Rect supply 24x12"), so jobs are comparable.
- Save your assemblies. If every 90-degree elbow with turning vanes already carries its labor and material, you stop rebuilding the workbook on every bid.
Our perspective
We have seen the same pattern on mechanical bids again and again. The straight duct number is usually fine. The bid that loses money is the one where fittings, dampers, hangers and testing were counted late, counted by feel, or counted twice.
That is a workflow problem more than a math problem. Estimators work from PDFs, in a workbook they rebuilt last month, with addenda coming in by email from three different GCs. Something slips.
We built Subascent for specialty trade subs, HVAC and mechanical among them, because that day-to-day is different from what a GC's software is designed around. Bid invitations land in one place so you see due dates. Takeoff happens on the PDF. Estimates tie to the job. QuickBooks sync and profit analytics mean the numbers you bid are the numbers you compare against once the job is running.
Our advice: count every fitting, keep the detail, and let software do the adding. Your time belongs on judgment, like gauge, access and what the spec really requires.
Dave
Takeoff tools for HVAC subs
If you do duct takeoffs from PDF plans, our PDF takeoff tools are built for that work, with estimating that connects to your bid and job records. See how estimating and takeoff works inside Subascent.

Plans are published at subascent.com: Starter at $49 per month ($490 per year), Scale at $99 per month ($990 per year), and Pro at $179 per month ($1,790 per year). The Takeoff add-on for PDF takeoff features is $99 per month. Compare them on the plans and features page.
FAQ
What is the difference between a duct takeoff and a duct fitting called a takeoff?
The phrase has two meanings. In estimating, a duct takeoff is the process of measuring and counting duct from drawings. In fabrication, a takeoff is also a fitting that branches a smaller duct off a main, such as a round top takeoff. In your estimate, count branch takeoffs as fittings, each by type and size.
What units do you use for a duct quantity takeoff?
Straight duct starts in linear feet, then converts to square feet of sheet metal and pounds using the gauge. Fittings, dampers, access doors and air devices are counted each. Liner and wrap go in square feet. Report quantities in the unit your fabricator or installer prices by.
Should I add a percentage for fittings instead of counting them?
Count them. Fitting labor and material do not scale with straight footage, so a blanket percentage tends to miss on both tight and open jobs. A published example says a rectangular elbow with turning vanes can cost three to four times as much to fabricate and install as the same weight of straight duct. Use your own shop history to set the labor per piece.
How much waste should I add to a duct takeoff?
Many estimators use 5% to 10% for cutting and scrap, depending on how many fittings and how complex the layout is. Choose the figure from your own shop's scrap history and state it on the bid.
What are the most common misses on a duct takeoff?
Volume dampers, access doors and test-and-balance taps are frequent ones. Notes, "by others" lines and owner-furnished items that still need install labor come next, followed by addenda that changed a sheet after you counted it.
Sources
- HVAC Duct Takeoff: What It Is, How to Do It and Estimating
- How to Calculate Duct Takeoff for HVAC Projects
- HVAC and Ductwork Estimating: Takeoff, Quantities, Cost
- Mechanical Estimating Manual: Sheet Metal, Piping and Plumbing (Wendes)
- The Ultimate Guide to MEP Takeoffs
- SMACNA Duct Weight Mistakes That Quietly Sink HVAC Bids
- HVAC and MEP Estimating and Takeoff Services, Division 23
- HVAC and Duct Takeoff Services
- MEP Quantity Takeoff QA Checklist
- What Is Duct Takeoff and Why It Matters in HVAC Estimating
- HVAC Estimating Services and Takeoffs