

The fastest reliable way to pull bid-ready quantities from a plan set is a five-step sequence: prepare the PDF, verify the scale on every sheet, measure each element, apply a template to convert dimensions into volume and weight, then export and QA. Skip any step and you're gambling with a number that decides whether the pour makes money.
Success looks specific. Every sheet is calibrated against a known dimension, not assumed from the title block. Quantities are grouped by pour phase and sitting in a CSV or SOV format ready to price. And a second set of eyes has reviewed the output before it goes into the bid.
Here's why the math matters: a 30-foot by 40-foot slab at 4 inches thick works out to area times depth divided by 27, or 1,200 square feet times 0.333 feet, divided by 27, resulting in about fourteen to fifteen cubic yards. Round down to save $150 on the load and you're short a wheelbarrow's worth mid-pour, paying pump standby fees while a crew stands around waiting on a second truck.
- Prepare: crop, rotate, confirm revision
- Calibrate: verify scale against a known dimension on every sheet
- Measure: slabs, footings, piers, rebar
- Apply templates: thickness and reinforcement assumptions
- Export and QA: pour-phase CSV, estimator-reviewed
Key Takeaways
Accurate concrete takeoffs from PDF plans depend on verified scale calibration, phase-based measurement, and a disciplined manual review sample before any quantity gets priced.
| Point | Details |
|---|---|
| Calibrate every sheet | Verify scale against a known dimension or column grid before measuring anything on that sheet. |
| Measure by element type | Use polygons for slabs, linear runs for footings, and counts for piers and embeds. |
| Apply standardized templates | Build default thickness and rebar assumptions once per assembly type to speed repeat bids. |
| Sample-check before pricing | Hand-verify 10 to 15% of measurements plus one full pour phase before the number goes into the bid. |
| Export by pour phase | Use Subascent's PDF takeoff add-on to move calibrated quantities straight into an SOV and QuickBooks sync. |
Table of Contents
- What a Concrete Takeoff From PDF Plans Actually Covers
- How Do You Perform a Concrete Takeoff From PDF Plans Step by Step?
- Which Tools Actually Speed Up a Concrete Takeoff?
- Concrete Quantity Calculations You'll Use on Every Bid
- What Are the Most Common Concrete Takeoff Mistakes?
- Turning Takeoff Output Into a Priced Estimate
- How Subascent Fits Into Your Concrete Takeoff Workflow
- Frequently Asked Questions
- Sources
What a Concrete Takeoff From PDF Plans Actually Covers
A concrete takeoff isn't just "how many yards." It's the full inventory of everything that touches the pour: slabs, footings, grade beams, piers, columns, curbs, pads, and elevated slabs, each with its own thickness, reinforcement, and formwork requirement. Miss a curb detail on sheet S-12 and you'll find out the hard way when the GC asks why your number came in low.
The output isn't one number either. A complete takeoff produces cubic yards, rebar weight broken out by bar size, linear feet for formwork, board feet for lumber, and counts of embeds and anchor bolts. Each of those feeds a different line in your estimate, and each one gets priced differently.
- Volume: cubic yards by element type (slab, footing, wall)
- Steel: rebar weight by bar size, plus mesh or fiber if specified
- Formwork: linear feet of edge form, board feet where lumber is called out
- Accessories: anchor bolts, embeds, dowels, control joint counts
Grouping all of this by pour phase, rather than by sheet or by trade category, is what turns a takeoff into something a dispatcher can actually use. When your export is labeled "Pour 1: Footings" instead of "Sheet S-3," the ready-mix order writes itself, and your crew schedule stops depending on someone remembering which footings go with which slab.
How Do You Perform a Concrete Takeoff From PDF Plans Step by Step?
This is the workflow itself, broken into the order you'd actually run it on a live bid.
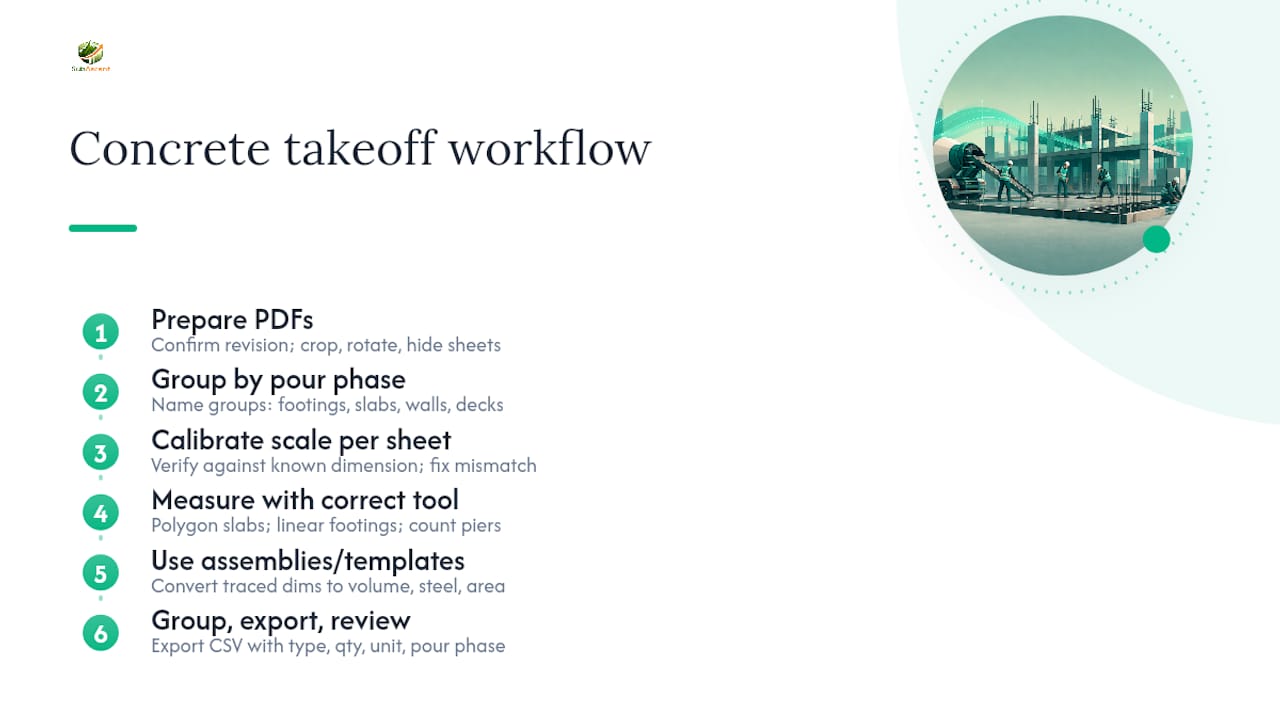
1. Prepare the PDF set before you touch a single measurement tool. Confirm you're working off the current revision, not last week's issue for bid. Crop out title blocks and general notes that clutter your workspace, rotate any sheets that print sideways, and pull the sheets you don't need for the concrete scope (electrical, plumbing) out of your active view. Check the legend and symbol key on the structural sheets. A hatch pattern that looks like a slab on one project might mean rigid insulation on the next.
2. Set up your project by phase, not by sheet number. Name your groupings the way you'll pour them: footings, slab on grade, walls, elevated decks. This sounds like a small administrative step, but it's the difference between a takeoff you can hand to a dispatcher and one that needs translation first.
3. Calibrate the scale on every single sheet. This is the step that gets skipped under deadline pressure, and it's the one that causes the most expensive mistakes. Printed scale notations lie. PDFs get resized when they're exported, plotted, or emailed, and a sheet that says 1/4" = 1'-0" may print at 92% depending on how it left the architect's office. The fix is to verify every sheet against a known dimension, like a column grid spacing or a dimensioned wall length that's called out in text on the drawing. If your calibrated scale doesn't match a dimension string elsewhere on the same sheet, stop and figure out why before you measure anything.
4. Measure using the right tool for each element type. Slabs and pads get a polygon tool, tracing the actual pour footprint including any notches or steps. Continuous footings and grade beams get a linear measurement, run along the centerline unless your assembly calls for something else. Piers, isolated column footings, and embeds get counted, not traced. Mixing up these three approaches is one of the most common ways estimators inflate or shrink a number without realizing it.
5. Apply templates or assemblies to convert raw dimensions into real quantities. This is where a traced polygon becomes cubic yards. A concrete takeoff assembly for "Slab on Grade" carries the thickness, the rebar spacing, and any mesh or fiber default built in, so tracing the footprint automatically returns volume, steel weight, and vapor barrier area in one pass. The same logic applies to strip footings, foundation walls, and curb and gutter runs. Building these templates once and reusing them across bids is what separates a two-hour takeoff from a two-day one.
6. Group everything by pour phase, export to CSV, and review before you price it. Your export should carry element type, quantity, unit, and pour phase in clean columns, not a jumble of sheet references. Before that number goes into your bid, sample it. Pick 10 to 15% of your measurements at random and hand-check them against the plan.
Pro Tip: Always fully re-verify one complete pour phase by hand, start to finish, rather than spreading your spot checks evenly across every phase. A single clean pour proves your calibration and your assembly templates are both dialed in; scattered spot checks across five different phases just prove you didn't make the same mistake five times in a row.
Which Tools Actually Speed Up a Concrete Takeoff?
The right tool depends less on budget and more on how your shop already works, and on how reinforced the sets you're bidding tend to be.
Browser-based takeoff platforms are the fastest to get running. No installation, no IT ticket, works on whatever laptop is open. That accessibility matters most for a two-person shop bidding on a Tuesday afternoon deadline. Desktop PDF markup applications trade some of that convenience for offline reliability and often deeper measurement precision. If you're bidding from a job trailer with spotty internet, desktop still has a real place.
AI-assisted cloud takeoff services fit a different problem: heavily reinforced, multi-sheet structural sets where manual tracing eats a full day. These tools can return draft footprint, net area, linear runs, and counts in a fraction of the time a person would need, but that speed only pays off if someone reviews the output before it's priced. The gain here comes specifically from pairing an automated first pass with a disciplined manual sample check, not from trusting the machine pass alone.
Spreadsheet calculators still earn their place for shops that want full manual control, or for smaller bids where building a digital takeoff isn't worth the setup time. A well-built spreadsheet with your standard formulas locked in is faster than any software for a single slab-on-grade bid.
Whatever you choose, judge it against three integration priorities:
- Does it export an editable CSV or SOV format, or lock you into a proprietary file?
- Can you group and label output by pour phase natively, or will you rebuild that structure by hand every time?
- Does it produce something you can hand to QuickBooks or your estimating workbook without rekeying?
A companion concrete calculator is worth bookmarking for quick sanity checks on slab and driveway quantities, especially when you want a second gut-check figure before committing to a tool's output. And if you're still choosing a broader platform for your shop, a breakdown of construction software built for subs covers the categories beyond just takeoff.
Concrete Quantity Calculations You'll Use on Every Bid
Three formulas cover almost every concrete takeoff you'll run, and they're worth having memorized rather than looking up each time.
Slab and pad volume is area times depth divided by 27. A 30-foot by 40 foot slab at 4 inches deep is 1,200 square feet times 0.333 feet, or 400 cubic feet, divided by 27, resulting in roughly fourteen to fifteen cubic yards.
Footing volume is length times width times depth divided by 27. A continuous footing running 180 linear feet, 20 inches wide, 12 inches deep works out to 180 times 1.67 feet times 1 foot, divided by 27, resulting in about eleven cubic yards.
Rebar weight starts with a bars-per-mat calculation, typically width times 12 divided by spacing, and then converts linear feet to weight using standard unit weights per bar size. Most rebar takeoff calculators build in a lap and waste allowance around 15% on top of the raw linear footage, which is the number that keeps your steel order from coming up short on-site.
| Calculation | Formula | Worked Example |
|---|---|---|
| Slab volume | Area × depth ÷ 27 | 1,200 sq ft × 0.333 ft ÷ 27 = 14.8 cu yd |
| Footing volume | Length × width × depth ÷ 27 | 180 ft × 1.67 ft × 1 ft ÷ 27 = 11.1 cu yd |
| Rebar per mat | Width × 12 ÷ spacing | 20 ft × 12 ÷ 12 in = 20 bars |
| Waste allowance | Raw LF × 1.15 | Standard 15% lap/waste factor |
Truck ordering adds one more wrinkle: ready-mix plants sell in full or partial loads, and a short load usually carries a per-yard surcharge. Rounding your final number up to the nearest half yard, rather than down, is cheap insurance against a short-pour penalty that can run into hundreds of dollars in standby and remediation costs on a single pour.
What Are the Most Common Concrete Takeoff Mistakes?
Most shortages trace back to a small handful of repeatable errors, and every one of them is catchable before the bid goes out.

Bad calibration tops the list. A sheet that's off by even a few percent compounds across every measurement taken from it, and the error often hides because the final number still looks plausible. Missing thickness callouts are next. A slab that steps from 4 inches to 6 inches near a loading dock, with the change noted only in a detail cut on another sheet, is an easy miss on a fast pass. Uncounted openings and recesses round out the top three. Trench drains, sleeves, and depressed slab areas for tile or coating subtract volume, and forgetting to net them out means over-ordering.
Run this checklist before any number leaves your desk:
- Recalculate one sample element by hand and compare it against the software or spreadsheet output
- Cross-check quantities against a second sheet or detail where the same element appears
- Verify rebar callouts on the plan match the bar marks in the reinforcement schedule
- Flag any dimension that doesn't reconcile, and issue an RFI rather than guessing
Pro Tip: If a dimension string on the plan doesn't match your calibrated scale within a fraction of an inch, don't split the difference and move on. Request a site verification or issue an RFI before you price the sheet. The five minutes it costs is nothing next to the cost of pricing an entire foundation off a bad calibration.
Turning Takeoff Output Into a Priced Estimate
Your export file is only as useful as the fields it carries. A clean CSV should include element type, pour phase, measured quantity, unit of measure, and a notes field for thickness or special conditions. Skip any of these and you'll be reopening the plan set to answer a question the export should have already settled.
- Export your CSV with columns matching your estimate workbook's naming convention exactly, so quantities drop in without reformatting.
- Map each element type to its SOV line item using a consistent naming standard across every bid, not a new label every time.
- Version-stamp every export with the plan revision date it was pulled from, so nobody prices an outdated set by mistake.
- Share the finalized export with foremen and suppliers directly, rather than a verbal recap, so field quantities match what was actually bid.
A well-mapped export also makes the bid breakdown itself faster to assemble, since your line items already carry the labels your estimate template expects. When a plan set gets revised mid-bid, treat the new sheets as a fresh calibration pass rather than a patch job. Re-verify scale, re-measure any changed element, and update the CSV with a new version tag rather than editing the old one in place.
Rules Worth Standardizing Across Your Shop
The single highest-leverage habit in this whole process is the sample-review rule: check 10 to 15% of your measurements by hand, plus one complete pour phase from start to finish, before any quantity gets priced. That combination catches both random small errors and systemic ones, like a template with the wrong default thickness baked in.
Template standardization pays off almost as much. Setting default thicknesses and rebar assumptions for your shop's most common assemblies, slab on grade, strip footing, foundation wall, means every new bid starts from a template that's already been checked once, rather than from a blank sheet.
The gap between a fast takeoff and an accurate one almost never comes down to the software. It comes down to whether someone standardized the templates once, checked them hard the first time, and then trusted the repeat use. Shops that skip that first hard check end up debugging the same rebar spacing mistake on every bid for a year.
Case studies from specific subcontractor clients and detailed figures from Subascent's own trade experience aren't publicly listed here, but the pattern above holds across small concrete shops running this workflow.
Why This Workflow Fits Small Specialty Concrete Subs
Manual QA paired with calibrated digital measurement beats either extreme on its own. Full manual takeoff is too slow for a busy bid calendar. Trusting an automated pass with zero review is how a bad scale calibration turns into a five-figure shortage. The middle path, standardized templates plus a real sample check, is what actually holds up on complex structural sets with mixed reinforcement.
Start with one template, get the thickness and rebar defaults right, and standardize your pour-phase naming before you build a second one. That discipline compounds faster than any software feature. The workflow described above is worth testing on your next bid before you decide what tool stack fits your shop.
How Subascent Fits Into Your Concrete Takeoff Workflow
Subascent is built around the exact workflow this article walks through, not a separate system you have to bolt on afterward. The PDF takeoff add-on supports scale calibration, pour-phase grouping, and export straight into a bid-ready SOV, so the quantities you measure become the estimate line items you price, without retyping anything.
For a small concrete shop, the real payoff shows up in three places: fewer short-pour surprises because your calibration and sample-review habits are baked into the same tool you measure with, faster turnaround on bids because your templates carry thickness and rebar defaults forward from job to job, and cleaner books because takeoff output syncs with QuickBooks instead of getting rekeyed by hand. Crew-facing quantities hand off to the field through the CrewTrack mobile app, so foremen are working from the same numbers the estimate was built on.
If your current process still means exporting a PDF, measuring by hand, and rebuilding the same spreadsheet every bid, start a Subascent trial and run your next takeoff through it side by side with your usual method.
Frequently Asked Questions
What's the fastest way to do a concrete takeoff from a PDF plan set? Prepare the PDF, calibrate the scale on every sheet against a known dimension, measure each element with the right tool (polygon, linear, or count), apply a template to convert dimensions into volume and weight, then export by pour phase and review a sample before pricing.
How do you calculate concrete volume from a PDF plan? Multiply the measured area by the depth in feet, then divide by 27 to get cubic yards. A 1,200 square foot slab at 4 inches deep works out to 400 cubic feet, or 14.8 cubic yards.
What software helps with a PDF concrete quantity takeoff? Browser-based takeoff tools work well for quick, low-overhead setups. Desktop PDF markup apps suit offline or Windows-dependent shops. AI-assisted cloud services speed up heavily reinforced, multi-sheet jobs, but every automated pass still needs an estimator review before it's priced.
How much rebar waste should you account for in a takeoff? Most rebar takeoff calculators build in a lap and waste allowance of around 15% on top of the raw linear footage, which keeps your steel order from coming up short once laps and cut waste are accounted for.
Why does pour-phase grouping matter for a concrete quantity takeoff? Grouping quantities by pour phase, rather than by sheet, means your CSV export maps directly to how you'll actually schedule trucks and crews, cutting the translation work between your takeoff and your field ordering.
When should you issue an RFI during a concrete takeoff? Issue an RFI whenever a dimension string on the plan doesn't reconcile with your calibrated scale, or when a detail callout conflicts with what's shown on the main sheet. Guessing on a discrepancy costs far more than the delay of asking.