
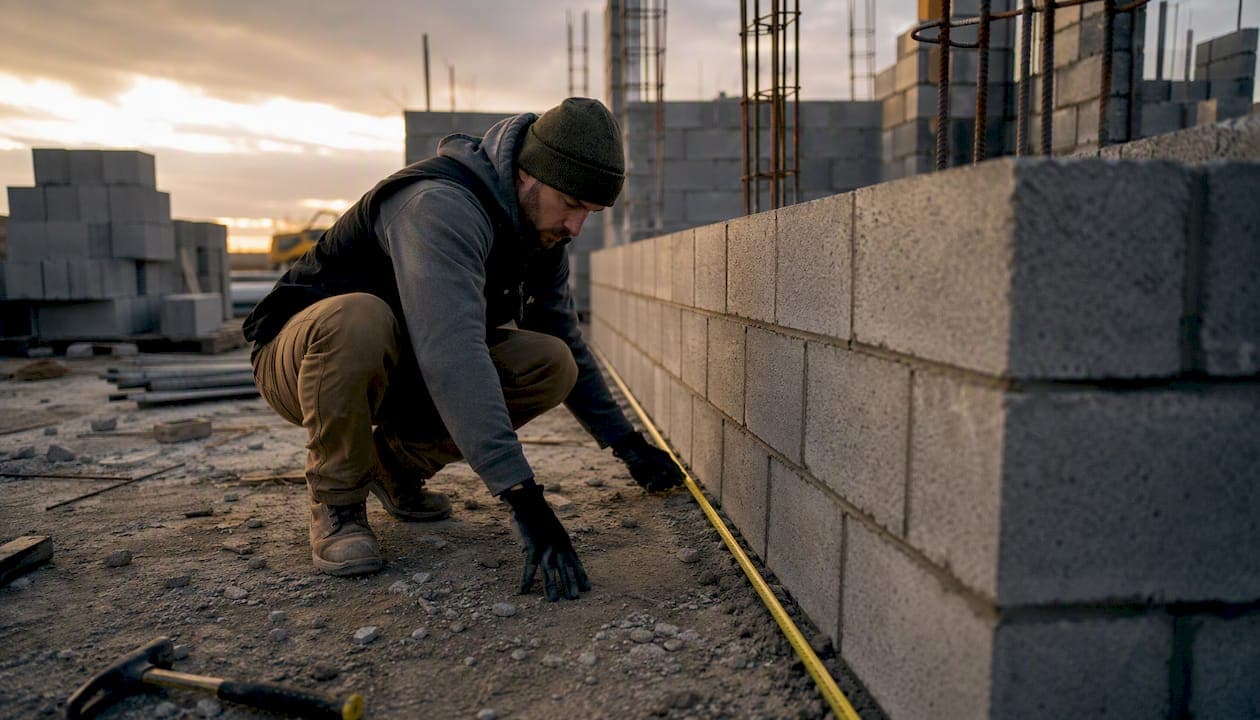
Measure outside-to-outside wall length, multiply by wall height to get gross area, subtract openings, then apply 1.125 blocks per square foot for standard 8×8×16 CMU with a 3/8" mortar joint. Add waste, grout, rebar, and bond beams as separate line items. That sequence, done consistently, is what separates a defensible CMU block layout takeoff from a rough guess.
Before you run a single number, record these assumptions on the takeoff sheet:
- Block size: nominal 8×8×16 (or confirm from the block schedule)
- Mortar joint: 3/8" (standard; verify spec section 04 20 00)
- Grout schedule: partial vs. solid grouting, per structural drawings
- Rebar spacing: vertical bars at 24", 32", or 48" o.c. as shown on S-sheets
- Waste allowance: 5–7% standard; 8–10% for complex walls
- Drawing revision and date used for the takeoff
Pro Tip: Print or pin your assumptions block at the top of every takeoff export. If the GC sends a revised set, you can spot exactly what changed and update only the affected quantities.
Key Takeaways
An accurate CMU block layout takeoff requires outside-to-outside measurement, the 1.125 blocks/ft² conversion factor, separate line items for grout and rebar, a documented waste allowance, and a written assumptions block attached to every export.
| Point | Details |
|---|---|
| Use the right conversion factor | Apply 1.125 blocks/ft² for 8×8×16 CMU with a 3/8" mortar joint as your starting point. |
| Measure outside-to-outside, subtract openings | Gross wall area minus opening area gives the net area for block count conversion. |
| Separate grout and rebar layers | Keep grout, rebar, and bond beams in separate takeoff layers so revisions don't require redoing the block count. |
| Apply waste before rounding | Use 5–7% for standard walls, 8–10% for complex work; apply the percentage before rounding to pallets. |
| Document every assumption | Record block size, revision date, waste %, grout schedule, and productivity rate on every takeoff export. |
| Subascent ties it together | Subascent's PDF takeoff tools with assumptions fields and CSV export keep quantities, revisions, and bid tracking in one place. |
Table of Contents
- What belongs in a CMU block layout takeoff
- A repeatable workflow: prep, measure, convert, verify
- The core math: blocks, mortar, grout, and rebar
- How bond beams, grouted cells, lintels, and openings change quantities
- Waste allowances and labor productivity for budgeting
- Common mistakes and a 90-second QA checklist
- Takeoff tool features that save time and reduce errors
- Worked example: a full CMU takeoff with numbers
- What the numbers don't tell you
- Subascent handles the workflow after the takeoff is done
- Sources
What belongs in a CMU block layout takeoff
A CMU takeoff that only counts blocks is an incomplete takeoff. Every bid should capture these line items:
Mandatory inclusions:
- Block count by size (8×8×16, 8×8×8, 4×8×16, etc.)
- Mortar volume (bags or cubic feet, by mix type)
- Grout volume, split between solid-grouted and partially grouted cells
- Vertical rebar: linear feet by bar size and spacing
- Horizontal rebar: bond beam courses and ladder wire if specified
- Bond beam blocks (U-blocks or lintel blocks) counted separately from field blocks
- Lintels: precast, steel angle, or CMU lintel blocks over openings
- Flashing and weep holes at base of wall and shelf angles
- Wall ties and anchors (masonry-to-structure connections)
- Below-grade waterproofing membrane where footings or grade beams are shown
Pull these from three drawing sources: architectural elevations (wall heights and openings), structural S-sheets (grout schedule, rebar, bond beam spacing), and masonry details (lintel types, flashing locations, tie patterns). If any of those three sources conflict, flag it before you bid.
Flag as exclusions unless the spec explicitly includes them: finish coatings, thin-brick veneer units, separate concrete pours (grade beams, columns), and CMU-adjacent concrete lintels that a concrete sub typically installs. Scope gaps here are where change orders start.
Pro Tip: Use the masonry bid breakdown as a checklist alongside your takeoff to confirm every line item has a corresponding cost before you submit.
A repeatable workflow: prep, measure, convert, verify
Following a consistent sequence on every project keeps quantities defensible and makes revisions fast. Construction takeoffs are most reliable when you start with larger components, confirm scale and revisions, and apply consistent measurement rules throughout.
Step 1: Prep
Confirm the drawing revision and date. Set the PDF scale and verify it against a known dimension on the sheet. Locate the masonry notes, block schedule, and specification section 04 20 00. Identify every block size and mortar joint thickness called out.
Step 2: Measure
Take outside-to-outside linear lengths for each wall run. Capture individual wall heights from elevations or record an average height with a clear note on which sheet you pulled it from. Using a poly-length tool and assigning a depth or height to derive wall area is faster than measuring each segment separately and produces a traceable area figure you can copy for below-grade membrane estimates.
Step 3: Convert
Compute gross wall area (length × height). Subtract opening areas (doors, windows, louvers). Apply the 1.125 blocks/ft² factor for 8×8×16 CMU to get net block count. Count bond beam courses and lintel blocks separately.
Step 4: Reinforcement and grout
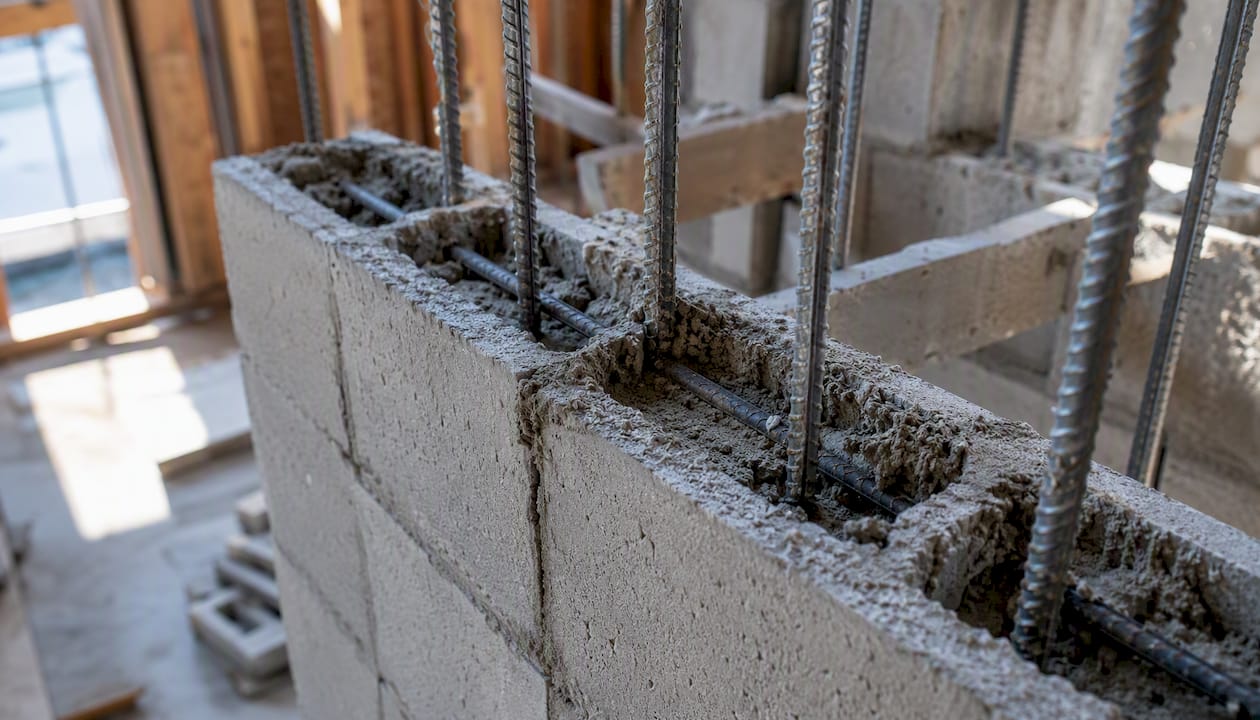
Read the structural drawings for the grout schedule. Identify which cells are grouted and at what spacing. Calculate grout volume per grouted cell and rebar lengths based on wall height and spacing. Keep these in a separate layer or column from the block count.
Step 5: Verify and document
Cross-check block count against elevations. Confirm top-of-wall elevation matches the structural drawings. Verify footing offset and below-grade extent. Record all assumptions with the sheet reference so a PM or reviewer can recreate the takeoff without calling you.
Pro Tip: When count takeoffs don't strictly depend on page scale, area-based CMU takeoffs absolutely do. Verify scale on every sheet before you draw a single measurement.
The core math: blocks, mortar, grout, and rebar
Block count
A standard 8×8×16 CMU with a 3/8" mortar joint has a face area of approximately 0.889 ft², which produces the 1.125 blocks/ft² conversion factor. Always confirm the actual face dimension on the drawing schedule; suppliers list nominal sizes, which differ from true face dimensions.
Formula:
(Wall length × Wall height) − Opening area = Net wall area (ft²) Net wall area × 1.125 = Block count (before waste) Block count × (1 + waste %) = Adjusted block count
Half-blocks at corners, returns, and jambs add up fast.
Mortar
A common rule of thumb is approximately 6.5 to 7 bags of Type S mortar per 100 blocks for standard 8×8×16 CMU. Confirm with your supplier's product data sheet for the specific mix specified.
Grout
For partially grouted walls, count the number of grouted cells per linear foot based on rebar spacing. Each standard 8×16 cell holds roughly 0.067 cubic feet of grout. Multiply cells by cell volume, then convert to cubic yards (divide by 27). For solid grouting, multiply net wall area by wall thickness and subtract block material volume.
Rebar
Vertical bars: divide wall length by bar spacing (in feet) to get bar count. Multiply bar count by wall height plus lap length (typically 24–30 bar diameters) for total linear feet. Horizontal bars in bond beams: multiply wall length by number of bond beam courses.
Rounding rules
| Item | Rounding Rule |
|---|---|
| Block count | Round up to nearest full pallet (typically 90–100 blocks/pallet) |
| Mortar | Round up to nearest full bag |
| Grout | Round up to nearest quarter cubic yard or pump load minimum |
| Rebar | Round up to nearest 20-foot bar length |
Apply waste percentage before rounding, not after.
How bond beams, grouted cells, lintels, and openings change quantities
These four items account for most of the errors in a CMU block count takeoff. Handle each one separately.
Bond beams: Count bond beam courses from the structural drawings. Bond beam blocks (U-blocks) replace standard field blocks in those courses. Pull them out of the field block count and list them separately with their own grout volume. A wall with bond beams at every 4 feet of height on a 10-foot wall has two full bond beam courses plus a top course.
Partial vs. solid grouting: Read the structural grout schedule carefully. Partial grouting at 32" or 48" o.c. means only specific cells are filled. Grout volume, rebar, and bond beams must be handled separately from the block count. Solid grouting fills every cell and dramatically increases both grout volume and pump time. Note which condition applies to each wall section.
Lintels and jambs: Count bond-beam blocks across each opening to form the lintel course. Add extra blocks for corbels or jambs as shown on the masonry details. If the spec calls for precast lintels, those come off the block count entirely and become a separate material line item.
Reinforcement spacing: Vertical bars at 24" o.c. require twice as many bars as 48" o.c. spacing. That difference directly affects grout volume because each grouted cell holds one bar. At 24" o.c. on a 120-foot wall, you have 60 grouted cells per course height. At 48" o.c., you have 30. The grout volume difference on a tall wall is substantial.
Pro Tip: Keep grout and rebar in separate takeoff layers from your block count. If the structural engineer revises the grout schedule mid-bid, you update one layer without touching the block count. This also gives reviewers a clean audit trail for shop drawing submittals.
Waste allowances and labor productivity for budgeting
Waste ranges
| Waste % | Recommended Use Case |
|---|---|
| 3–4% | Simple rectangular walls, experienced crew, minimal openings |
| 5–7% | Standard commercial walls, mixed opening count, typical complexity |
| 8–10% | Complex walls with many openings, curved sections, or new crews |
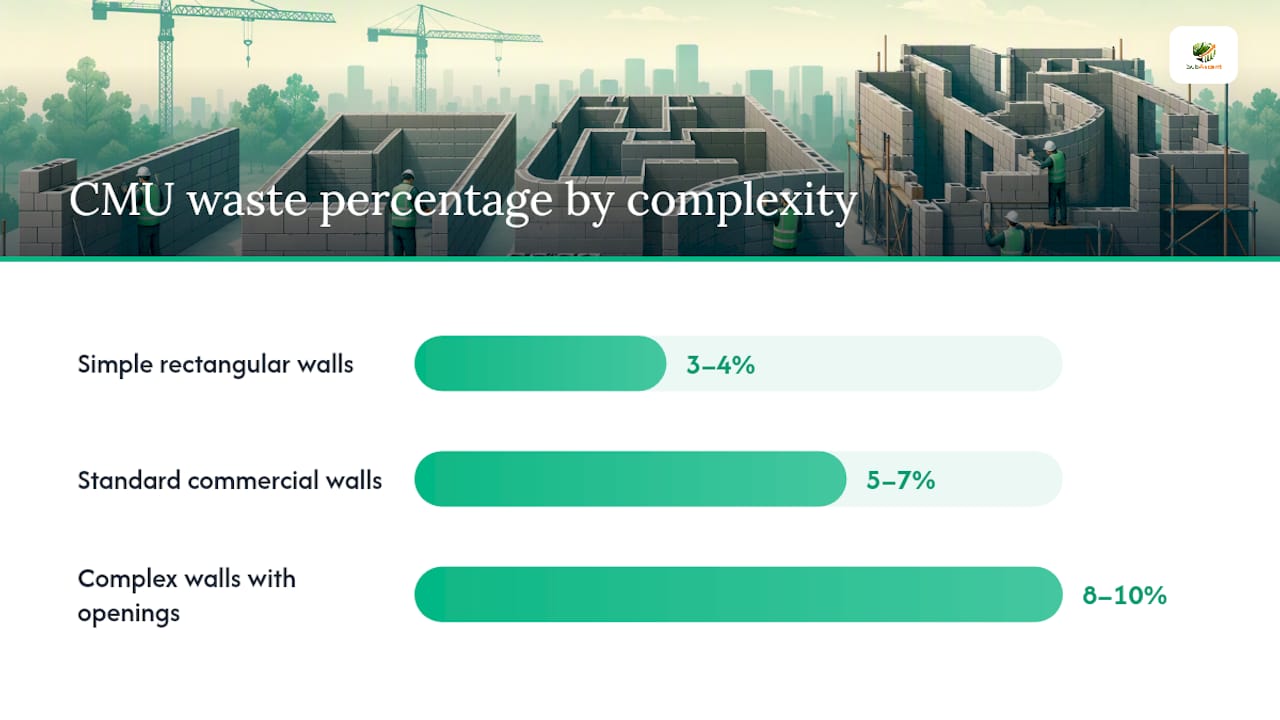
CMU estimating guides recommend a 5–10% waste allowance depending on wall complexity.
Labor productivity
Blocks-per-hour rates vary by crew experience and wall complexity. Rough planning ranges:
- Experienced crew, simple wall: 35–50 blocks per hour
- Mixed crew, standard commercial: 20–35 blocks per hour
- Complex wall or new crew: 12–20 blocks per hour
These are planning figures for labor unit budgeting, not guaranteed production rates. Adjust based on your own historical data.
Pallets and ordering
Most suppliers ship 8×8×16 CMU on pallets varying typically within a certain range of block counts. Confirm pallet size with your local supplier before ordering; regional pallet counts vary. Add freight minimums to your material cost when the order falls below a full truck load. Reconciling delivered pallets against ordered quantities at the job site is a foreman task, but the estimator needs to know the pallet size to round correctly.
Assumptions to record: waste %, pallet size, supplier name, and productivity rate used. These go on the takeoff export so the PM knows what was assumed when the job runs.
Common mistakes and a 90-second QA checklist
Red flags to watch for:
- Assuming top-of-wall elevation without checking the structural drawings
- Missing footing offsets or below-grade wall extents (adds blocks and waterproofing)
- Ignoring bond beam requirements in walls taller than 8 feet
- Forgetting half-blocks at ends, returns, and jambs
- Using gross wall area without subtracting openings
- Applying waste after rounding instead of before
QA checklist (run before you finalize any bid):
- Drawing revision confirmed and dated on the takeoff
- PDF scale verified against a known dimension
- Block size confirmed from the block schedule, not assumed
- Structural grout schedule reviewed; partial vs. solid noted per wall
- All openings deducted from gross wall area
- Bond beams and lintels counted separately from field blocks
- Waste % recorded with justification (simple/standard/complex)
- Labor productivity rate recorded
- Footing offset and below-grade extent confirmed from foundation drawings
- Assumptions block attached to the takeoff export
That last point matters more than most estimators realize. A PM reviewing the bid two weeks later, or a GC asking about scope, needs to see what you assumed. If it's not written down, it doesn't exist.
Takeoff tool features that save time and reduce errors
The right software features cut the repetitive math and make revisions fast. Look for these specifically:
- Layered takeoffs: separate layers for CMU field blocks, bond beams, grout cells, and rebar. Change one layer without touching the others.
- Poly-length and wall-area tools: draw a wall run once, assign height, get area. Copy the run and modify depth to estimate below-grade membrane area without redrawing.
- Copy/paste of wall runs: duplicate a repeated wall detail with a modified dimension instead of re-measuring from scratch.
- Assumptions and notes fields: attach the assumption text directly to the takeoff object so it exports with the quantities.
- CSV export: push quantities directly to your estimating spreadsheet without manual re-entry.
For field verification on jobs where drawings are unclear or as-built conditions differ, mobile 3D measurement apps like Hover (iOS) and Hover (Android) let you capture wall dimensions from photos. These are useful for verifying existing conditions, not for primary takeoff from construction documents.
Color-code your layers before you start. CMU field blocks in one color, bond beams in another, grout cells in a third. A quick visual scan at the end catches missed walls faster than re-reading every number.
Pro Tip: Build a reusable assumptions template with your standard block size, mortar joint, waste %, and productivity rate pre-filled. Paste it into every new takeoff and update only what changes. You'll spend 30 seconds instead of 5 minutes on setup.
Worked example: a full CMU takeoff with numbers
Assumptions
| Item | Value |
|---|---|
| Block size | 8×8×16 nominal |
| Mortar joint | 3/8" |
| Wall length | 120 ft (outside-to-outside) |
| Wall height | 10 ft |
| Door openings | 3 openings × standard size each = 63 ft² total |
| Waste | 7% |
| Grout schedule | Partial, vertical cells at 32" o.c. |
| Bond beams | Every 4 ft of height (2 courses) + top course |
| Rebar | #5 vertical at 32" o.c., #5 horizontal in bond beams |
Step-by-step math
Gross wall area: 120 ft × 10 ft = 1,200 ft²
Net wall area: 1,200 − 63 = 1,137 ft²
Block count (before waste): 1,137 × 1.125 = 1,279 blocks
Pallets (at 90 blocks/pallet): 1,369 ÷ 90 = 15.2 → order 16 pallets
Bond beam blocks: 3 courses × 120 ft ÷ 1.33 ft per block = 271 U-blocks (add to block total or list separately)
Grout volume (partial): 120 ft ÷ 2.67 ft spacing = 45 grouted cells per course. At 10 ft height with 8" block, approximately 15 courses. 45 cells × 15 courses × 0.067 ft³/cell = 45.2 ft³ ÷ 27 = 1.67 cubic yards → order 2 cubic yards
Vertical rebar: 45 bars × (10 ft + 2 ft lap) = 540 linear ft of #5
Bond beam rebar: 3 courses × 120 ft = 360 linear ft of #5
Final quantities
| Item | Quantity | Order Quantity |
|---|---|---|
| 8×8×16 CMU (field) | 1,369 blocks | 16 pallets |
| Bond beam U-blocks | 271 blocks | 3 pallets |
| Grout | 1.67 cu yd | 2 cu yd |
| #5 vertical rebar | 540 lin ft | 27 bars (20 ft ea.) |
| #5 bond beam rebar | 360 lin ft | 18 bars (typical length each) |
Assumptions block (paste into bid packet):
Takeoff by: [Estimator Name] | Date: [Date] | Drawing revision: [Rev #] Block: 8×8×16 nominal, 3/8" mortar joint | Waste: 7% | Grout: partial at 32" o.c. Productivity assumed: 25 blocks/hour | Pallet size: 90 blocks | Supplier: [Name] Source sheets: A-201, S-101, Masonry Detail 4/S-201
What the numbers don't tell you
Most CMU takeoff guides stop at the math. The part that actually costs masonry subs money is the assumption that never got written down.
The 1.125 blocks/ft² factor is solid. The waste ranges are reasonable. But every one of those numbers assumes the drawings are complete, the grout schedule is final, and the structural engineer hasn't issued an addendum since you last opened the PDF. On real jobs, none of those things are guaranteed.
The estimators who consistently hit their material budgets aren't necessarily faster at math. They're more disciplined about recording what they assumed and flagging what they couldn't confirm. When the GC calls about a scope question three weeks after award, the revision reference is what saves you.
One more thing worth saying plainly: order one extra pallet on any multi-building or phased job. The freight cost of a second delivery almost always exceeds the cost of carrying an extra pallet. Confirm local pallet sizes with your supplier before you finalize quantities; regional counts vary enough to change your order by a full pallet.
Subascent handles the workflow after the takeoff is done
Running a clean CMU takeoff is one part of the job. Getting it into a bid, tracking the revision, and making sure the PM knows what was assumed when the job starts — that's where most masonry estimators lose time.

Subascent gives masonry estimators layered PDF takeoff tools with assumptions fields, CSV export to your estimating sheet, and bid tracking that keeps every revision tied to the right drawing set. When the GC sends a revised plan, you update the affected layer, not the whole takeoff. The assumptions you recorded stay attached to the quantities, so the PM who runs the job sees exactly what the estimate was built on. No separate email, no phone call to reconstruct the logic.
Start a free trial and see how much faster a bid moves when the takeoff, assumptions, and bid tracking live in one place.
Sources
- CMU Block Count — Blocks, Mortar, Rebar | ProjectCalc
- CMU Block Estimating Guide
- Estimating CMU Wall and Waterproofing Quantities from Architectural and Structural Drawings - Free Video Tutorial
- Construction Takeoffs: A Complete How-To Guide
- ConstructConnect Takeoff - 07.06 Drawing Count Takeoff | Community