
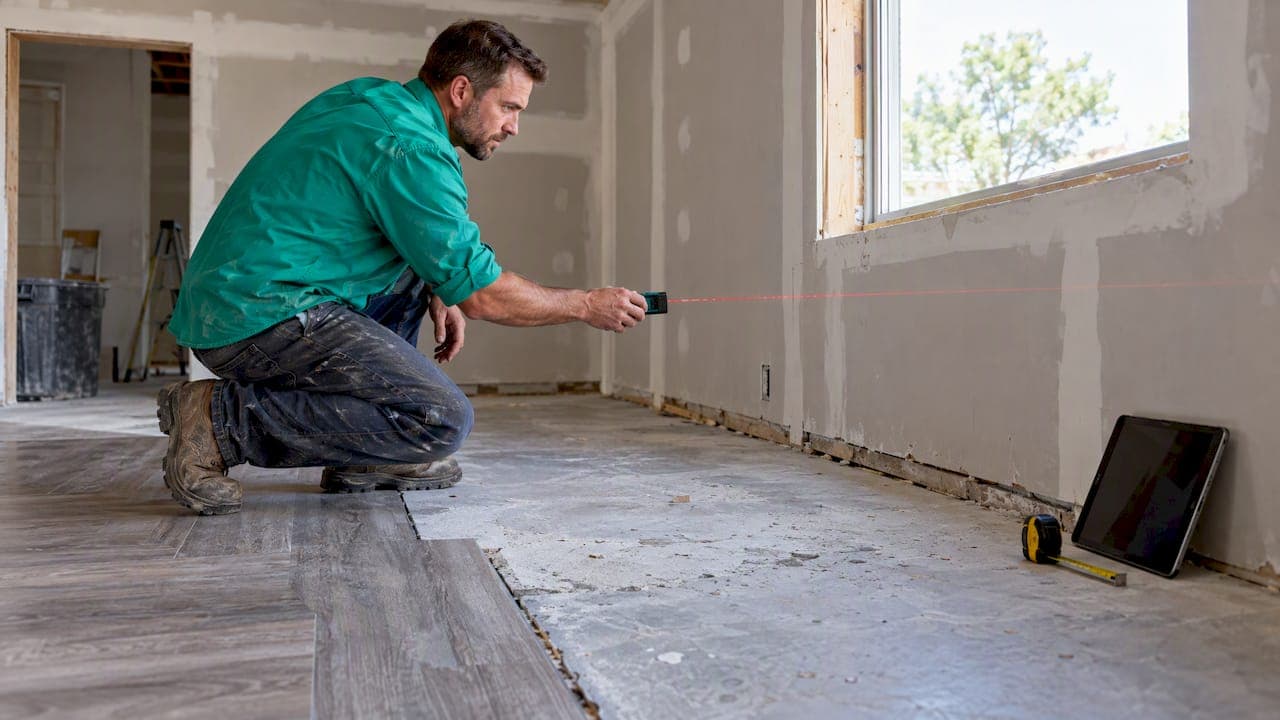
The three methods worth knowing are scaled-plan arithmetic, digital PDF tracing (manual or AI-assisted), and targeted field verification. Use digital tracing for simple residential jobs, add manual verification plus a field measure for commercial or patterned installs, and never release a bid without at least one manual QA pass on digital output.
TL;DR:
- Verifying scale on every PDF plan set with known dimension checks prevents common measurement errors in flooring bids.
- Layout patterns such as diagonal or herringbone significantly increase waste, requiring explicit assumptions to be documented in the bid.
- Field verification of substrate conditions and irregular room measurements is essential to avoid costly change orders mid-project.
- Combining manual tracing with AI-assisted detection speeds up takeoff accuracy, but flagged low-confidence areas still require human review.
- Consistently exporting takeoff data in the same units and verifying key measurements helps streamline integration with estimating software.
Table of Contents
- What to Prepare Before Measuring
- Basic Measuring Methods and Scale Verification
- Waste Factors and How Layout Patterns Affect Quantities
- Tile Takeoff Methods: Measuring, Accessories, and Setting Materials
- Hardwood and LVP Takeoff: Plank Layout, Subfloor Prep, and Moisture Testing
- Carpet Takeoff: Roll Width, Seams, Stairs, and Padding
- Digital Takeoff Workflows and Tool Best Practices
- Common Errors, QA Checks, and a Verification Checklist
- Practical Tips and a Worked Example
- Advanced Digital Takeoff Techniques
- Integrating Takeoff Data With Estimating and Project Management Software
- Handling Irregularly Shaped or Complex Spaces
- Adjusting Takeoff Measurements for Subfloor Conditions
- A Short Note From Dave
- How Subascent Supports Flooring Takeoffs
- FAQ
- Sources
What to Prepare Before Measuring
Before you open a single PDF, gather the documents that tell you what you're actually measuring. Floor plans give you shape and dimension, but the finish schedule tells you which product goes where, and the door and window schedule flags openings that change your linear footage. Pull the reflected ceiling plan too if transitions tie into soffits or bulkheads.
Spec notes matter more than most estimators give them credit for: a note calling for a diagonal layout or a 1/3 offset staggers your waste calculation before you've measured a single room. Field data closes the loop. Capture threshold heights, substrate type, any moisture test results, vertical elevation changes between rooms, and anomalies like out-of-square walls or old adhesive residue.
Before handing a job to the estimator, a foreman or PM should confirm:
- Current floor plan set matches the finish schedule revision
- Substrate condition noted (concrete, ply, existing flooring to remove)
- Threshold and transition locations marked on the plan
- Any moisture or leveling concerns flagged in writing
Basic Measuring Methods and Scale Verification
Scale errors are the single most common cause of bad flooring bids, so verify scale before you measure anything. The fastest check is a two-point verification: pick two points with a known dimension on the plan (a wall length from the dimension string) and confirm your tool's measurement matches. A door-width quick check backs this up, since most commercial doors run a standard width you can confirm against the door opening measurement reference before trusting the rest of the sheet.
Once scale is confirmed, extract area using one of two approaches:
- Bounding-box method: draw a rectangle around the room and subtract fixed obstructions. Fast, but only safe for simple rectangular rooms.
- Polygon segmentation: trace the actual room outline point by point. Slower, but necessary for angled walls, bays, or irregular closets.
Counting rules matter as much as area. Stairs get counted by tread and riser, not by a flat square footage guess. Thresholds and transition strips get counted individually, tied to each doorway or material change, not estimated as a percentage of perimeter.
Convert to order units carefully: square footage divides into boxes based on the box coverage printed on the product spec sheet, and carpet area converts to linear yards based on roll width, never a flat square-yard division. Round up at the box or roll level, never at the raw square footage level, or you will come in short on install day.
Pro Tip: Run your two-point scale check on every sheet in a set, not just the first one. Plan sets get mixed revisions more often than estimators expect.
For scale verification in more depth, our guide on PDF plan takeoff walks through the full seven-step process.
Waste Factors and How Layout Patterns Affect Quantities
Waste is not one number. It is a baseline tied to the product, adjusted up or down by layout and jobsite conditions.
- Standard straight-lay installs typically carry the lowest baseline waste because cuts are minimal and repeatable.
- Herringbone and diagonal layouts raise waste meaningfully because nearly every perimeter piece requires an angled cut, and offcuts rarely reuse elsewhere in the room.
- Large-format tile or plank increases waste at odd-shaped perimeters since a single bad cut wastes a larger, more expensive piece.
- Edge conditions, built-in thresholds, and stair nosings all pull extra material that a flat area calculation won't catch.
Manufacturer installation guides back this up directly. The EcoSquare carpet tile installation guideline recommends center-datum layout with chalk lines and directional arrows specifically to balance perimeter cuts, a layout choice that changes your waste number before you've ordered a single box.
Write your waste assumption directly on the bid line item, not buried in a note.
Tile Takeoff Methods: Measuring, Accessories, and Setting Materials
Measure by actual tile coverage area when the layout includes borders, insets, or a mixed pattern; measure by raw room area only when the install is a simple straight-lay field tile with no special conditions. The difference matters because border tiles and pattern repeats eat material that a room-area number won't show.
- Field tile waste: 10 to 15% is a common baseline, rising with large-format tile or diagonal setting.
- Pattern repeats and borders: add material separately, since these don't scale linearly with field tile.
- Setting materials: include bullnose or edge trim, underlayment where required, thinset by square footage coverage rate on the bag, and grout by joint width and tile size.
A quick labor-productivity note helps translate quantities into hours: large-format tile installs slower per square foot than small-format mosaic, even though material waste often runs lower. Build that distinction into your labor line, not just your material line.
Hardwood and LVP Takeoff: Plank Layout, Subfloor Prep, and Moisture Testing
Measure by net square footage for standard installs, but switch to plank counts when the job calls for a specific stagger pattern or herringbone layout where exact piece counts control waste more than area does.
- Waste runs higher on shorter planks and herringbone layouts since more end-matching cuts are required.
- Standard staggered layouts typically carry lower waste than herringbone or basket-weave patterns.
- Moisture testing, leveling compound, or underlayment should be added as separate bid items whenever the substrate condition is unconfirmed; the EcoSquare installation guideline cites ASTM F1869 and ASTM F2170 as the standards for concrete moisture thresholds, a reference point worth applying across resilient and wood products with moisture sensitivity.
- Always include transitions, reducers, and thresholds as separate line items tied to each doorway and material change.
Carpet Takeoff: Roll Width, Seams, Stairs, and Padding
Carpet takeoff starts with roll width, not room area, because seam placement determines how much roll you actually need to buy.
- Lay out seam locations against standard roll widths (typically 12 or 15 feet) to minimize seams in traffic areas.
- Convert the seamed layout into linear yards needed, rounding up to the next full yard per roll run.
- Add padding and tack strip by linear foot of perimeter, and calculate stairs and landings separately since they consume carpet at a different rate than open floor.
Patterned carpet needs extra yardage for pattern matching across seams, and modular carpet tile follows its own layout logic entirely, often set from a center datum point per the EcoSquare guideline, which also calls for dry-laying tile before adhesive to confirm the pattern before committing material. Document seam locations and roll direction assumptions directly on the takeoff so installers aren't guessing on install day.
Digital Takeoff Workflows and Tool Best Practices
A hybrid workflow beats either pure manual or pure automated takeoff on its own. Set the scale first, trace the primary room areas yourself to build a baseline, then run AI detection if your software offers it, and flag anything the tool marks as low-confidence for manual review.
- Set and verify scale on every sheet before tracing anything.
- Trace primary areas manually first to catch obvious plan errors early.
- Run AI-assisted detection for repetitive rooms or large floor plates.
- Flag and manually verify any detection below the tool's confidence threshold.
- Export quantities into your estimating workbook in the same unit format every time to avoid rebuild errors.
Industry coverage of construction technology in 2026 points to a consistent pattern: AI-assisted takeoff tools speed up routine, clean-plan jobs substantially. However, accuracy drops on scanned or poorly rendered plans, and a human review pass on flagged areas remains necessary before quantities go into a bid.
Pro Tip: Treat every AI-flagged low-confidence area as a sample room. Manually remeasure it before trusting the exported total.
Exporting cleanly matters as much as measuring accurately. Mismatched units or inconsistent room naming between your takeoff tool and your estimating workbook cause more rework than most estimators expect, a problem covered in detail in our piece on plumbing takeoff workflows, which applies the same export logic to flooring.
Common Errors, QA Checks, and a Verification Checklist
Most flooring bid errors trace back to a handful of repeat mistakes: unverified scale, doubled quantities from scaling a local PDF copy that doesn't match the master set, forgotten transitions or adhesive line items, and waste assumptions copied from a different layout than what's actually specified.
- Re-run your scale check against a second known dimension before finalizing any sheet.
- Manually measure one sample room per space type and compare it against your digital output.
- Reconcile layer visibility; hidden layers in a PDF can hide walls or fixtures that change your area.
- Cross-check accessories (transitions, trim, adhesive, underlayment) against the room list to confirm nothing was dropped.
Write your assumptions and contingencies directly into the bid document for the GC and purchasing team: waste percentage, layout pattern, and any area left unverified pending field confirmation. For deeper guidance on avoiding doubled quantities specifically, see our breakdown on scaling PDF drawings locally.
Practical Tips and a Worked Example
Say a bedroom measures 12 feet by 14 feet, giving 168 square feet of net area. If the product covers 24 square feet per box, that's roughly 8 boxes, rounded up from 7.7.
- Confirm dims against the plan, not just the finish schedule note.
- Apply waste before converting to boxes, never after.
- Round up at the box level, not the square footage level.
- Field-verify any room where substrate condition is unconfirmed.
Unknown substrate work is the most common source of a mid-job change order.*
Advanced Digital Takeoff Techniques
Laser measuring tools paired with a digital takeoff platform let you capture exact room dimensions on-site and sync them directly into your takeoff software, skipping the scale-verification step entirely for that room since the dimension comes from a direct measurement rather than a scaled drawing. This matters most on renovation work where as-built conditions rarely match the original plan set.
3D modeling takes this further by letting you build a volumetric model of a space, which helps on jobs with vertical transitions, sloped floors, or multi-level spaces where a flat 2D takeoff misses elevation changes that affect material quantities, particularly for transition pieces and self-leveling compound volume.
Combining the two works well in practice: use 3D modeling for the overall space layout and complex geometry, then confirm individual room dimensions with a laser tool during a site visit. The laser-measured dimensions become your verification check against the model, the same role a manual sample-room measurement plays against a digital PDF trace.

For jobs with repetitive floor plates, like a multi-unit residential project, a 3D model built once and verified in one or two units can carry forward to the remaining units with far less rework than retracing every unit from scratch. The tradeoff is setup time: building an accurate 3D model takes longer upfront than a flat 2D trace, so it pays off most on larger or more geometrically complex projects rather than small single-room jobs.
Integrating Takeoff Data With Estimating and Project Management Software
Takeoff data earns its value only when it flows cleanly into your estimating workbook without manual re-entry. The biggest point of failure is unit mismatch: a takeoff tool exporting square footage while your estimating sheet expects square yards creates an error that's easy to miss until the order is already placed.
Standardize your export format once and use it consistently across every job, matching unit type, room naming convention, and rounding rule between your takeoff tool and your estimating software. This single habit eliminates most of the rebuild work estimators do when a takeoff doesn't map cleanly into the existing workbook.
Where your takeoff and project management tools are connected, flag waste assumptions and layout notes as structured data rather than free text where possible, so a PM reviewing the job later can see exactly why a quantity was set the way it was without digging through old notes or asking the original estimator. This becomes especially valuable on change orders, where a PM needs to recalculate a partial room quantity quickly without rebuilding the whole takeoff.
Keep a single source of truth for each job. When a revised plan set comes in, re-run the takeoff against the new set rather than patching the old numbers, and update the estimating workbook in full rather than adjusting individual line items by hand.
Handling Irregularly Shaped or Complex Spaces
Irregular rooms, angled walls, bay windows, and curved walls all break the bounding-box shortcut, so polygon segmentation becomes mandatory rather than optional. Trace the actual perimeter point by point, including any jogs or angled sections, rather than approximating with a rectangle and an estimated deduction.
For curved walls specifically, break the curve into short straight segments for tracing purposes; the error introduced by this approximation is small enough to ignore for flooring purposes, unlike for trades where a precise curve matters more.
Split complex spaces into logical sub-areas when a single room contains multiple distinct zones, like an open-concept living and dining area with a change in flooring product partway through. Measure each zone separately rather than trying to capture the whole space in one polygon trace, since this makes waste calculation and material ordering far more accurate.
For rooms with built-in obstructions like islands, fixed cabinetry, or structural columns, measure the full room polygon first, then subtract each obstruction's footprint individually rather than estimating a flat deduction percentage. This matters more as obstruction count rises, since errors compound quickly with a flat estimate.
Always field-verify at least one irregular room per job before finalizing quantities, regardless of how confident the digital trace looks. Angled walls and curves are the areas most likely to carry a meaningful scale error that a flat rectangular room would never reveal.

Adjusting Takeoff Measurements for Subfloor Conditions
Subfloor condition changes your bid in ways a flat area takeoff never captures on its own. Concrete subfloors that fail a moisture test need a vapor barrier or moisture mitigation system added as a separate line item, not folded into the flooring material cost. The EcoSquare installation guideline ties its moisture thresholds directly to ASTM F1869 and ASTM F2170, and a subfloor that fails either test needs remediation before flooring goes down, which adds both material and labor to your bid.
Uneven subfloors need self-leveling compound, and the volume needed depends on the depth of the low spots, not the square footage of the room. Estimate leveling compound by volume using the average depth across the affected area, not a flat per-square-foot guess, since depth varies significantly between a mild dip and a true low spot.
Existing flooring that needs removal before the new install changes labor hours more than it changes material quantities, but it can also reveal substrate issues you couldn't see during the original site visit, which is why experienced estimators build a contingency line for substrate work discovered after demo rather than assuming the subfloor underneath matches the visible surface.
Always note your subfloor assumption directly on the bid: "assumes existing substrate passes moisture test" or "allowance included for up to 1/4 inch leveling" gives the GC and purchasing team a clear picture of what's included versus what could trigger a change order.
A Short Note From Dave
Consistent rules beat clever shortcuts. The estimators who win profitable bids aren't the fastest at tracing a PDF, they're the ones who apply the same waste and layout logic every time and write it down. Pick one scale verification routine, require one manual sample-room check per job, and document your waste and layout assumptions on every bid before it goes out the door.
— Dave
How Subascent Supports Flooring Takeoffs
Our PDF takeoff add-on supports workflows like setting scale, tracing areas, flagging low-confidence detections, and verifying quantities before export. It integrates with bid tracking and QuickBooks sync features, eliminating the need for separate spreadsheets.

Getting started takes three steps:
- Start a trial and upload a plan set
- Run the scale and trace workflow on one job
- Complete the manual verification pass before exporting to your estimate
Check out Subascent to see the takeoff add-on alongside the rest of the platform.
FAQ
What is the rule of 3 in flooring?
The "rule of 3" generally refers to a plank-layout guideline for hardwood and LVP installs: stagger end joints so no two seams in adjacent rows line up within roughly 3 inches of each other, and avoid repeating the same stagger pattern more than three rows in a row. It's a layout convention rather than a formal standard, and specific manufacturer installation guides take precedence when they conflict.
What is the best flooring takeoff software?
There's no single best tool for every shop; the right choice depends on whether you need PDF tracing, AI-assisted detection, or tight integration with your existing estimating workbook. We offer a PDF takeoff add-on built specifically for trade subcontractor workflows, including flooring, alongside bid tracking and QuickBooks sync.
What are the different types of flooring methods?
Flooring takeoff methods generally fall into three categories: scaled-plan arithmetic done manually, digital PDF tracing done manually or with AI-assisted detection, and field measurement used to verify or supplement either approach. Most estimators combine at least two of these on any job beyond a simple single-room install.
What are some AI-powered tools for construction takeoffs?
AI-assisted takeoff tools typically handle area and linear detection from PDF plans, flagging low-confidence regions for manual review rather than claiming full automation. Industry coverage in 2026 notes these tools speed up routine, clean-plan jobs but still require a human verification pass on scanned or complex drawings before quantities go into a bid.
How do waste factors change for patterned flooring layouts?
Patterned layouts like herringbone, diagonal, or basket-weave increase waste compared to a standard straight lay because more pieces require angled or end-matched cuts that can't be reused elsewhere in the room. Estimators should model the specific layout pattern called for in the spec rather than applying a single blanket waste percentage across every job.