
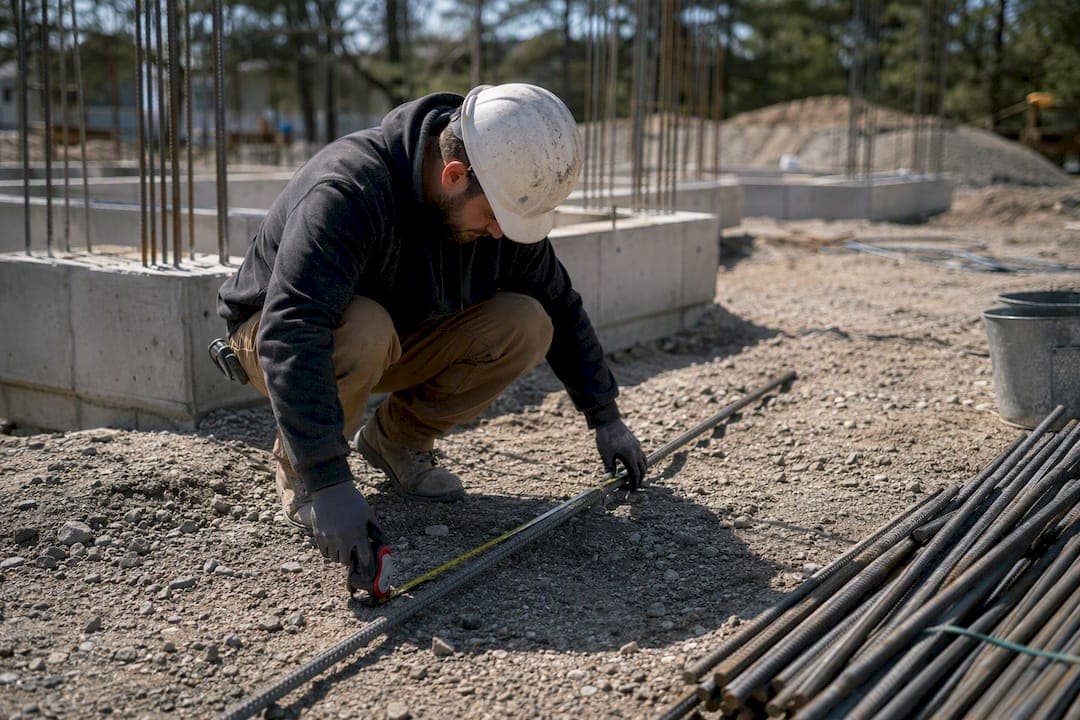
The reliable way to produce accurate, auditable rebar quantities is to match the method to drawing fidelity and project complexity. Use manual takeoff for small, simple scopes. Use calibrated 2D/PDF takeoff for most subtrade bids. Reserve selective 3D/BIM checks for congested or high-risk zones like transfer slabs and coupling beams.
The right pick depends on three things: how clean the structural drawings are, how big and congested the job is, and how fast the bid is due. Section 6 below walks through a full worked example, and Section 10 gives you Dave's assumption-log template so every count is traceable back to a specific drawing reference and reviewer.
- Manual: best for small pours, simple footings, quick change-order math
- 2D/PDF: the default for most rebar quantity takeoff work on subtrade bids
- 3D/BIM: targeted validation on congested nodes, not a full replacement
Key Takeaways
Accurate rebar takeoffs come from matching the method to project complexity and backing every count with a written assumption log.
| Point | Details |
|---|---|
| Match method to complexity | Use manual for small scopes, 2D/PDF for most bids, and 3D checks only on congested nodes. |
| Confirm the structural set first | Working from architectural drawings instead of structural ones is the top cause of missed bars. |
| Apply the four-step formula | Count, then length with laps, then weight using standard weight-per-foot values by bar size. |
| Set waste by complexity | Use 5% for simple slabs and up to 12% for congested beam and column work. |
| Log every assumption | A short assumption register tied to drawing references cuts bid disputes and speeds fabrication handoff. |
| Centralize the workflow | Subascent's PDF takeoff tools keep rebar counts, bar lists, and bid pricing in one platform instead of three. |
Table of Contents
- Rebar Takeoff Methods Compared: Manual, 2D, and 3D
- How Do You Run a Manual Rebar Takeoff?
- What Does a 2D/PDF Rebar Takeoff Involve?
- When Do You Need 3D/BIM Quantity Checks?
- Rebar Takeoff Formulas: Count, Length, Laps, and Weight
- How Do Laps, Hooks, and Couplers Change Your Quantities?
- QA Checklist: Catching Rebar Takeoff Mistakes Before Bid Day
- What Tools and Templates Do You Need for Rebar Takeoff?
- A Practitioner's Assumption Log and Sequencing Notes
- Why Most Takeoff Advice Skips the Boring Part
- Get Rebar Takeoffs Out the Door Faster With Subascent
- Sources
Rebar Takeoff Methods Compared: Manual, 2D, and 3D
Each of the three rebar estimation approaches trades speed against certainty, and picking wrong costs you either hours or accuracy.
- Manual takeoff (ruler, scale, spreadsheet): cheap and fast for small scopes, but slow and error-prone once a job passes a few hundred bars.
- 2D/PDF takeoff: calibrated digital measurement tools cut counting errors and speed up markup review, though the output is only as good as the PDF's drawing quality.
- 3D/BIM checks: catch clashes and congestion that flat drawings hide, but they cost more setup time and only pay off on complex geometry.
Before you touch a scale or a takeoff tool, run this checklist: Is the drawing set clean and dimensioned, or full of "typical" notes and cross-references? Is the structure simple (a slab, a few footings) or genuinely congested (transfer beams, shear walls, coupling beams)? How many days do you have before the bid is due? Does your team have PDF takeoff software, or just a spreadsheet and a printed set? The answers point you toward the workflow detailed in the next three sections.
How Do You Run a Manual Rebar Takeoff?
Manual still works, and for a lot of small subtrade jobs it's the fastest path to a number you can defend. Here's the sequence:
- Pull the structural drawings, the Bar Bending Schedule (BBS) if one exists, the spec section on reinforcement, and any addenda. Architectural sets don't carry reinforcement detail. Estimators who grab the wrong set are the single most common source of missed bars, according to the rebar estimation guide from Paradigm Engineering.
- Calibrate your scale against a known dimension on the sheet before you measure anything.
- Mark elements by pour so you don't double-count or skip a placement.
- Count bars with the standard formula, then log every assumption (cover, lap length, spacing) as you go, not after.
Your spreadsheet template needs these columns at minimum: element name, bar size, spacing, quantity, run length, laps, waste percentage, total length, weight, and a notes field for anything you had to assume.
Pro Tip: Log the drawing sheet number and revision date next to every line item, not just the bar size. When an addendum changes one footing detail, you'll know in seconds which rows need a second look instead of re-checking the whole workbook.
Manual is still the right call for a single slab-on-grade or a handful of footings. Escalate to 2D digital takeoff once you're past roughly 500 bars or the drawing set has more than a few sheets of reinforcement detail.
What Does a 2D/PDF Rebar Takeoff Involve?
Calibrated PDF takeoff is where most rebar quantity takeoff work happens on subtrade bids, and it's the method that scales from a small tenant improvement to a mid-size commercial job without changing your workflow.
Start by calibrating the PDF against a dimensioned reference line on the structural sheet, then save that calibration as a template so every reviewer on your team measures against the same scale. Saved calibrations improve consistency across reviewers, which matters most when two estimators split a large bid between them, a point the Paradigm Engineering guide makes directly.
- Use count tools for discrete bars (dowels, ties, individual stirrups) and linear tools for continuous runs (slab mats, wall bars).
- Layer your markups by pour and by element type so a reviewer can toggle layers on and off to check your work without redoing it.
- Color-code by pour sequence. This single habit catches the reinforcement in tie beams, corbels, and doweled connections that estimators routinely miss when working from a flat, uncolored markup.
When you're ready to export, build the bar list with size, shape code, length, and quantity per pour, attach your assumption notes, and label bundles by pour and crane zone so the field crew and the fabricator are reading the same sequence you built the takeoff around.
Pro Tip: Addenda almost always land after you've already started markups. Keep a running "delta" layer that only shows changes from the last issued set, so you're not re-scanning 40 sheets to find the one dimension that moved.

When Do You Need 3D/BIM Quantity Checks?
Flat 2D takeoff misses one thing consistently: how bars actually intersect in three dimensions. Transfer slabs, structural cores, and coupling beams are where congestion turns a clean linear count into a guess, and that's exactly where a targeted BIM check earns its cost.
- Run a 3D check on transfer slabs, shear wall cores, coupling beams, and any node with more than two intersecting bar layers.
- Confirm the model date matches the issued-for-construction drawing set. A model built from an earlier design pass will quietly misstate quantities in exactly the zones you're trying to protect.
- Pull bar lists and clash reports from the model export, then reconcile them line by line against your 2D-derived spreadsheet rather than replacing it wholesale.
The Dass Rebar estimating guide frames this as a hybrid workflow: calibrated 2D takeoff carries the bulk of the job, and 3D checks validate the small percentage of the structure where geometry creates real uncertainty. That combination, not a full BIM rebuild, is what most specialty subs can realistically afford and still trust.
Rebar Takeoff Formulas: Count, Length, Laps, and Weight
Every rebar quantity takeoff, regardless of method, reduces to the same four-step math. Copy these formulas straight into your spreadsheet:
- Count:
floor(usable dimension ÷ spacing) + 1— for example, a 20-foot-wide slab section with 12-inch spacing and 3 inches of edge clearance on each side gives you 19 feet of usable width, sofloor(19 ÷ 1) + 1 = 20 bars. - Total length:
(count × run length) + lap allowance + hook allowance, per the calculation method the Steel Solver takeoff guide outlines. - Stirrups and ties: perimeter of the shape plus a fixed hook allowance (typically 3 to 6 inches per hook depending on bend detail), multiplied by quantity.
- Weight: total length multiplied by the weight-per-foot for that bar size, using standard reference values like TakeoffCalc's calculator logic.
Weight-per-foot reference: #3 bar runs 0.376 lb/ft, #4 runs 0.668 lb/ft, #5 runs 1.043 lb/ft, and #6 runs 1.502 lb/ft, per TakeoffCalc. Always confirm against your local supplier's spec sheet before finalizing an order.
Worked example, single slab section: A 20 by 30 foot slab needs #4 bars at 12 inches on center each way, with a 24 inch lap and 3 inch clearance.
- Bars running the 20 foot direction:
floor(19 ÷ 1) + 1 = 20 bars, each 29.5 feet long (30 feet minus 6 inches clearance), plus one lap of 2 feet:20 × 31.5 = 630 feet. - Bars running the 30 foot direction:
floor(29 ÷ 1) + 1 = 30 bars, each 19.5 feet, plus one lap:30 × 21.5 = 645 feet. - Combined length before waste:
630 + 645 = 1,275 feet. - Apply an 8% waste factor for moderate congestion:
1,275 × 1.08 = 1,377 feet. - Weight at 0.668 lb/ft:
1,377 × 0.668 = 920 lb, rounding up to the nearest full stick length for ordering.
Waste factors typically range 5% for simple, repetitive slab work up to 12% for congested beam and column work, according to Steel Solver's breakdown. That range is not decoration.
How Do Laps, Hooks, and Couplers Change Your Quantities?
Splice details are where a clean formula meets a real drawing, and it's worth reading the structural notes twice before you commit to a lap length.
- Pull lap and development length notes directly from the structural drawings or the general notes sheet. Never assume a standard length applies across the whole set.
- A typical rule-of-thumb lap range runs roughly 40 to 60 bar diameters (40 to 60d) depending on bar size and concrete strength, but always confirm against the project spec before finalizing quantities.
- Mechanical couplers can shrink that lap requirement to roughly 10 to 20 bar diameters, cutting material waste and site labor substantially compared to standard lap splices, per Steel Solver's analysis.
- Flag epoxy-coated and GFRP bars as a separate line item in your takeoff. Different pricing, different lead times, and different handling requirements mean they need their own procurement note, not a footnote buried in the standard bar list.
QA Checklist: Catching Rebar Takeoff Mistakes Before Bid Day
A five-minute proof pass catches most of the errors that cost real money later.
- Confirm you're working from the structural set, not the architectural set. This single mix-up is the most common source of missed reinforcement.
- Recheck your PDF calibration against a second dimensioned line, not just the first one you used.
- Search the drawing set for "Typ." notes. They often hide reinforcement that applies to elements you haven't individually marked.
- Search separately for secondary elements: tie beams, corbels, doweled connections. These get skipped constantly in a flat count.
- Set a clear round-up rule for stick ordering (round up to the nearest full stick, always) and apply it consistently across the takeoff.
- Have a second estimator peer-review any congested node before the bid goes out.
Mixing units (feet versus inches on spacing) and missing laps entirely are the two mistakes that show up most often, and both are caught by the checklist above if you actually run it rather than skim it. For a broader look at how bid math goes wrong across a project, this piece on why contractors underbid construction projects is worth a read. On anything with more than two congested nodes, require a written sign-off from a second reviewer before the number goes on the bid form.
What Tools and Templates Do You Need for Rebar Takeoff?
Match the tool to the job size, not the other way around. A spreadsheet plus a PDF takeoff tool handles most single-trade bids. Dedicated takeoff software for multi-trade estimating earns its cost once you're running several bids a week across different scopes. Full BIM/rebar platforms make sense only on large, congested projects where a detailer's markup would otherwise take days.
- Bar list / BBS: size, shape code, quantity, and length per pour, formatted for the fabricator.
- Assumption register: every cover, lap, and spacing decision you made, tied to a drawing reference.
- Pour-sequenced bundle labels: so field crews unload trucks in the order the crane needs them.
- Cut-length sheets: stock lengths and trim allowances for the shop.
If a single job's rebar scope exceeds roughly $150,000 or the drawing set includes multiple transfer conditions, hiring a detailer for a BIM pass usually costs less than the risk of an under-quantified bid.
A Practitioner's Assumption Log and Sequencing Notes
The assumption log is the cheapest insurance you'll ever build into a takeoff. A short register that ties each number back to a decision dramatically reduces bid disputes and speeds the handoff to detailing, according to the Dass Rebar estimating guide.
Track these fields for every element: element name, drawing reference, lap default used, cover, coupler zones (if any), epoxy-coated zones, stock length assumed, reviewer initials, and a timestamp.
- Group your bar list by pour and by crane zone, not just by element type, so field crews get bundles in the order they'll actually place them.
- Label every bundle with the pour number and zone before it leaves the shop.
- Coordinate truck delivery windows against the pour schedule, not against when the fabricator happens to finish.
On one job, right-sizing stock lengths to match the beam schedule instead of ordering standard 20 or 40 foot sticks across the board cut trim waste noticeably and reduced the number of field cuts the crew had to make on-site, echoing the stock-length optimization insight from Dass Rebar.
| Field | Why it matters |
|---|---|
| Drawing reference | Ties every number to a specific sheet and revision |
| Lap default | Prevents disputes over which splice length was assumed |
| Coupler/epoxy zones | Flags procurement items that need separate ordering |
| Reviewer initials + timestamp | Creates accountability for congested-node sign-off |
Why Most Takeoff Advice Skips the Boring Part
Most guides on rebar takeoff focus on the glamorous stuff: BIM clash detection, software features, formula derivations. What they skip is the boring discipline that actually prevents bid disputes: writing down your assumptions as you make them, not reconstructing them after a GC questions your number.
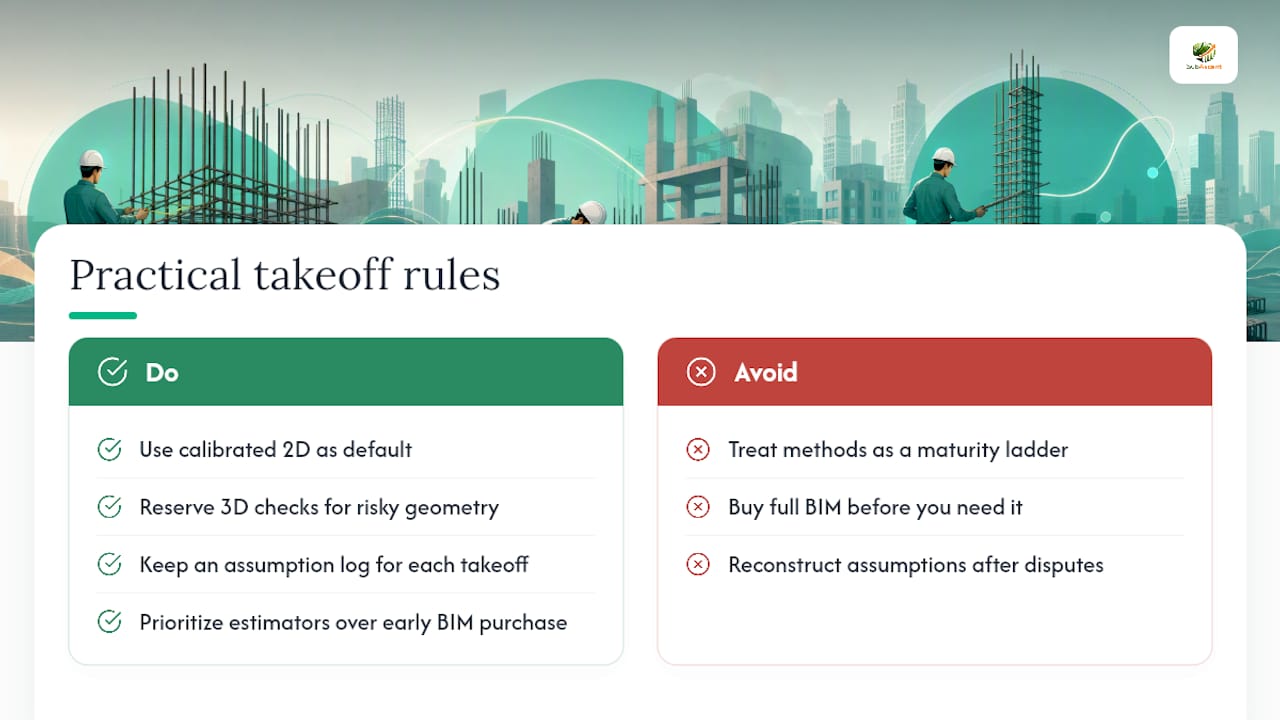
Conventional advice treats manual, 2D, and 3D as a maturity ladder, where you're supposed to graduate from spreadsheets to BIM as your business grows. That's backwards for most specialty subs. The right move is hybrid from day one: calibrated 2D as your default, with 3D checks reserved for the specific nodes where geometry actually creates risk. Buying a full BIM platform before you need one wastes money that a $500 to $15 million revenue sub could put into better estimators or faster bid turnaround.
If you take one thing from this piece, make it the assumption log. Every dispute I've seen traced back to a bid comes down to someone assuming a lap length or a cover dimension and never writing it down. A five-column log costs you two minutes per takeoff and saves hours of argument later.
— Dave
Get Rebar Takeoffs Out the Door Faster With Subascent
Subascent is built for the exact workflow this article just walked through: calibrated PDF takeoffs, bar list exports, and assumption tracking that lives in the same platform where you're already building your bid, instead of scattered across a spreadsheet and a separate PDF tool.

The PDF takeoff add-on handles the calibration and layering work covered above, so your rebar quantities, your bar list, and your bid pricing sit in one place instead of three. That matters most on multi-trade weeks, when you're running rebar, framing, and masonry takeoffs back to back and can't afford to rebuild a workbook for each one. Estimators managing steel and rebar scopes alongside other trades get one workflow instead of a patchwork of tools, and project managers get a bar list that's already formatted for the field. Start a free trial and run your next rebar bid through it before your next submission deadline.
Sources
- Rebar Estimation Guide: Process, Accuracy & Best Practices
- Rebar Takeoff: Formula, Steps, Waste Reduction & Real Examples
- Rebar Calculator | TakeoffCalc
- What Is Rebar Estimating? Get Clear Answers in 2026 - Dass Rebar