

A repeatable field photo documentation workflow runs six steps: Plan → Capture → Verify → Ingest → Organize → Report/Archive. Start your pilot on one crew, make photo fields required in your daily report form, and build a "sync at end of shift" habit before you add any other process. For tooling, skip the loose camera roll. Use an integrated capture-in-form workflow that ties every photo to a project record the moment it's taken, preserving timestamp and location automatically.
Pro Tip: Pick one active job for your 30-day pilot. A single crew, a single project, and a short checklist will teach you more than a company-wide rollout on day one.
Key Takeaways
A repeatable field photo documentation workflow, built around six steps and enforced through required form fields and a daily sync habit, is the fastest path from scattered camera rolls to defensible project records.
| Point | Details |
|---|---|
| Six-step workflow | Plan → Capture → Verify → Ingest → Organize → Report/Archive covers every phase from mobilization to archive. |
| Three-shot sequence | Wide, mid, and close shots for each subject, with a placard in close-ups, satisfy OSAC and SWGDE documentation standards. |
| Metadata at capture | GPS, timestamp, and uploader ID must embed at capture, not be added later, to preserve chain-of-custody. |
| 30-day pilot approach | Start with one crew and one project; track photo completion rate, sync compliance, and QA pass rate before scaling. |
| Subascent for subs | Subascent's capture-in-form workflow, CrewTrack mobile app, and metadata enforcement support this exact six-step process for specialty trade subcontractors. |
Table of Contents
- What does a field photo documentation workflow actually look like?
- What photos should you capture at each project phase?
- How do you frame and sequence shots so they hold up later?
- How should you name, tag, and store field photos?
- How do you verify photos before they enter the project record?
- How do photos feed reports, RFIs, and document control?
- Who is responsible for what in the photo documentation process?
- Copy-paste photo plan template and trade-specific checklists
- What should you look for in a field photo documentation tool?
- What are the legal and retention requirements for job-site photos in the U.S.?
- Your 30-day implementation plan, day by day
- How does photo documentation connect to BIM and project management platforms?
- What most field managers get wrong about photo documentation
- Subascent runs this workflow for specialty trade subs
- Sources
What does a field photo documentation workflow actually look like?
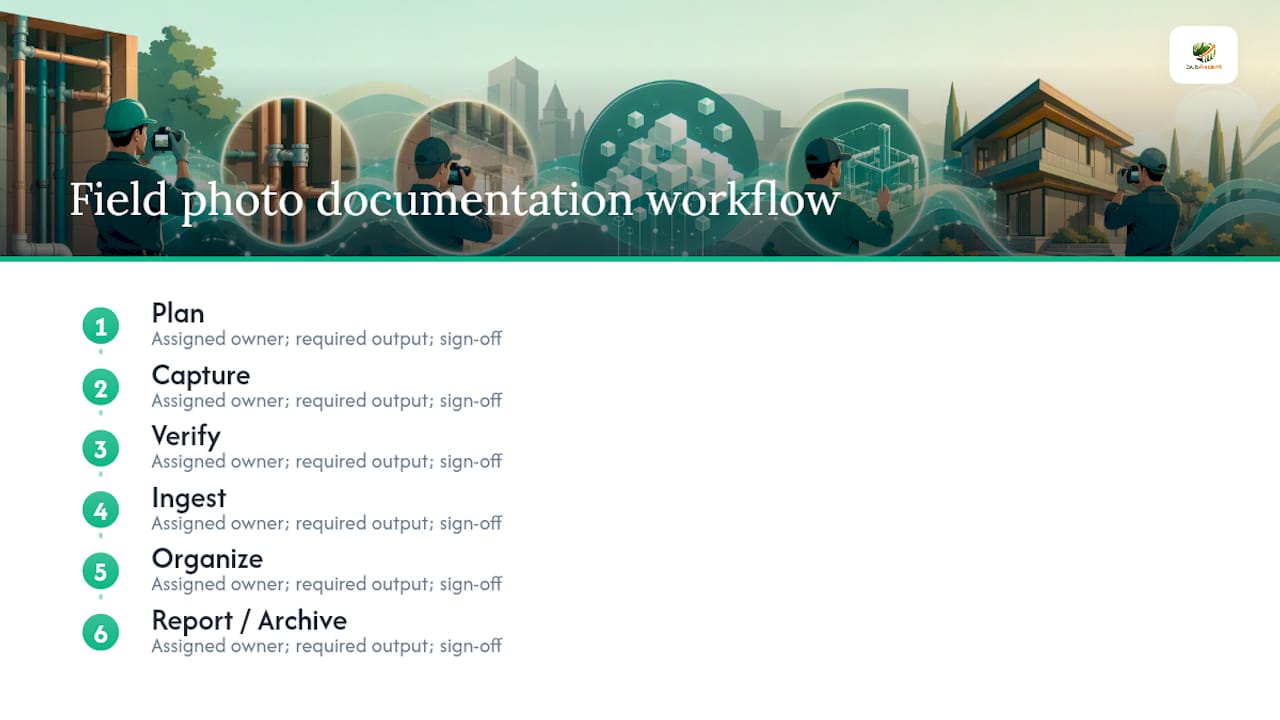
The six steps below form the backbone of a defensible photo documentation process. Each step has a clear owner, a required output, and a sign-off point. Map these to your daily operations and you have the skeleton of a written SOP.
Step 1: Plan
Before the crew mobilizes, define what photos are required, at which milestones, and by whom. The output is a short Photo Documentation Plan (one page is enough) that lists capture windows, required shot types, acceptable devices, minimum resolution, metadata rules, and retention schedule. NASA's Imagery Procedure and Metadata Standard requires exactly this: project-level documentation plans that specify timing, cataloging, metadata, and traceability to work statements.
Plan checklist:
- Capture windows defined per project phase
- Required shot types listed (overall, mid, close)
- Acceptable devices and minimum resolution stated
- Metadata fields required (timestamp, GPS, uploader ID, work order link)
- Retention schedule and storage location confirmed
- Responsible roles assigned
Step 2: Capture
Crews take photos in the field using the three-shot sequence: wide, mid, close. Every photo is captured inside a form or daily report, not a personal camera roll, so metadata attaches automatically. The output is a batch of geotagged, timestamped images linked to a work order or daily report record.
Capture checklist:
- Three-shot sequence completed for each subject
- Placard or label in frame for close-ups
- Photo captured inside the project form (not device gallery)
- GPS and timestamp confirmed active on device
Step 3: Verify
Before photos enter the project record, a reviewer checks completeness, legibility, and metadata presence. The OSAC Standard for Scene Documentation Procedures requires that originals be preserved and that metadata be recorded at capture, not added later. Verification is the gate that keeps bad images out of reports and submittals.
Verify checklist:
- All required views present (wide, mid, close)
- Metadata fields populated (timestamp, GPS, uploader)
- Images legible and in focus
- Originals preserved, no in-place edits
- Reviewer sign-off logged
Step 4: Ingest
Verified photos move from the field device into the project's central repository. Batch sync over Wi-Fi at end of shift is the standard habit. The output is a confirmed upload with no gaps in the photo log.
Step 5: Organize
Photos are renamed, tagged, and sorted into the correct project folder. File names follow the naming convention. Tags link images to phases, assets, and work orders. The output is a searchable archive where any image can be found by project, date, location, or asset ID.
Step 6: Report/Archive
Organized photos feed daily reports, RFIs, change orders, and owner updates. At project close, the full set moves to long-term archival storage with retention dates applied. The Library of Congress Digital Imaging Workflow covers this arc: setup, capture, metadata, post-processing, and archival output as a connected sequence, not isolated tasks.
| Step | Owner | Output | Sign-off |
|---|---|---|---|
| Plan | Project supervisor | Photo Documentation Plan | PM or project lead |
| Capture | Crew / foreman | Geotagged images in project form | Foreman |
| Verify | Supervisor / office admin | QA-passed photo batch | Reviewer |
| Ingest | Foreman / office admin | Confirmed upload, no gaps | System log |
| Organize | Office admin | Named, tagged, sorted archive | Admin |
| Report/Archive | PM / office admin | Reports, RFIs, long-term storage | PM |
What photos should you capture at each project phase?
The most common field documentation failure is not taking too few photos. It's taking the wrong ones. Crews photograph finished work and skip the conditions that matter for disputes: what was there before, what was covered up, and what was damaged by others.
Preconstruction and existing conditions
Photograph every surface, penetration, and adjacent property condition before a single tool touches the site. For a masonry sub, that means existing cracks in adjacent walls. For an HVAC crew, it means the existing equipment nameplate, the condition of the curb, and any pre-existing ceiling damage in the work area.
- Overall: full room or elevation showing existing conditions
- Mid: specific areas of concern (cracks, stains, prior repairs)
- Close: serial numbers, nameplates, existing damage details
Mobilization and foundation/structure
Document material deliveries, staging areas, and structural work before it gets covered. For a concrete sub, the rebar layout before the pour is the single most valuable photo in the project. For framing, it's the anchor bolt pattern and sill plate condition.
- Overall: site layout and material staging
- Mid: structural assembly in progress
- Close: connection details, fastener patterns, embedded items
MEP before cover
This is the highest-stakes capture window for electrical, plumbing, HVAC, fire protection, and low-voltage subs. Once drywall goes up, these photos are the only record of what's inside the wall.
- Overall: full wall or ceiling bay showing rough-in layout
- Mid: circuit or pipe run with visible reference points
- Close: device box, fitting, or connection with label in frame
Pro Tip: For electrical and plumbing, photograph every panel, manifold, and junction box with the cover off and a placard showing the circuit or zone ID. That photo alone resolves most "what's in that wall" disputes.
Finishes, testing/commissioning, punchlist, and as-built
- Finishes: before/after shots at each area; close-ups of defects noted on the punchlist
- Testing: instrument readings on screen with the asset in frame
- As-built: final installed position of every device, valve, or panel
Trade-specific must-haves
| Trade | Single most valuable photo per phase |
|---|---|
| Electrical | Panel interior with circuit labels, cover off, before energizing |
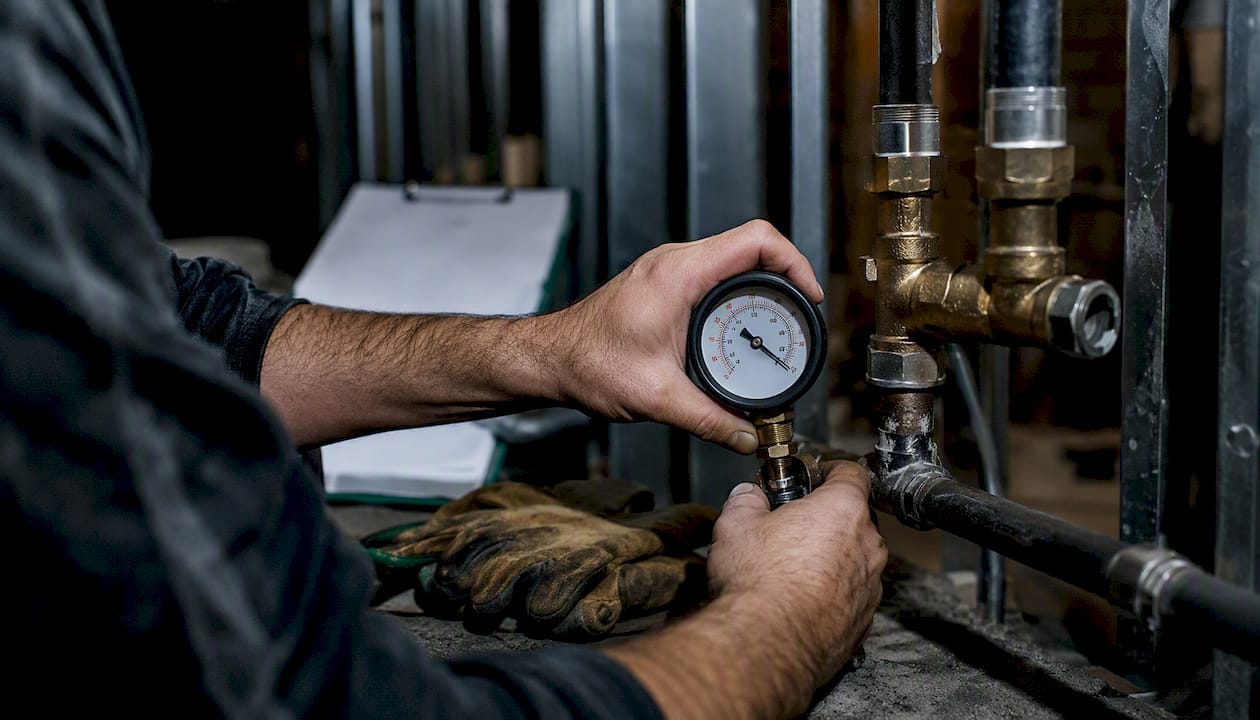
| Plumbing | Pressure test gauge reading with manifold in frame |
| HVAC | Equipment nameplate plus ductwork layout before ceiling close |
| Masonry | Mortar joint and coursing detail at each lift before scaffold moves |
| Painting | Surface prep condition before primer, and final coat sheen at raking light |
| Roofing | Substrate condition before membrane, and seam detail at each lap |
How do you frame and sequence shots so they hold up later?
Technique matters more than equipment. A $600 smartphone with good light and a steady hand produces more useful documentation than a DSLR with a shaky grip and no placard.
The SWGDE Guidelines for Evidence Photography establish the standard sequence: overall, then mid-range, then close-up, with camera position, scale, and photographer identity documented for each subject. That sequence is not forensic overkill. It's the minimum needed to reconstruct what you saw and when.
Three-shot sequence in practice:
- Wide (site context): Show the full room, bay, or elevation. The viewer should be able to locate the subject on a floor plan from this shot alone.
- Mid (work or asset): Move in to show the specific assembly, run, or area. Include a reference point (door frame, column, grid line) so the viewer can orient.
- Close (detail or defect): Fill the frame with the subject. Include a placard showing the asset ID, work order number, or grid reference. For defects, include a scale reference (tape measure, coin, or ruler).
Placard conventions:
Write the project code, date, and asset or location ID on a small whiteboard or laminated card. Hold it in frame or set it beside the subject. Never cover the defect or connection with the placard.
Camera settings quicklist:
- Resolution: standard (8–12 MP) for routine progress shots; maximum for defects, nameplates, and serial numbers
- EXIF timestamp: confirm device clock matches site time zone before the first shot of the day
- White balance: auto works for most field conditions; switch to "cloudy" for overcast exterior shots
- Stabilization: on for all shots; brace against a wall or use both hands for close-ups in low light
How should you name, tag, and store field photos?
Loose photos in a shared folder are not documentation. They're a liability. The Library of Congress Digital Imaging Workflow treats metadata, post-capture processing, and archival output as a single connected workflow, not afterthoughts. Apply the same discipline on the job site.
Filename template
[ProjectCode]_[YYYYMMDD]_[Location]_[AssetID]_[ShotType]_[Initials]
Example: HVAC-0412_20260315_RTU-3_AHU-07_CLOSE_JR.jpg
Every field in the name is searchable. If your project management system auto-generates a project code, use it. If not, create a short alphanumeric code at project setup and put it in the Photo Documentation Plan.
Required metadata fields:
- Timestamp (device EXIF, confirmed against site time)
- GPS coordinates (lat/long embedded in EXIF)
- Uploader identity (user account or initials in filename)
- Work order or RFI number (tag or linked record)
- Phase and shot type (tag: "MEP-before-cover," "close," "defect")
Pro Tip: Tools with automated tagging cut the time office staff spend sorting bulk uploads after a job. If your platform can apply phase and shot-type tags at capture, turn that feature on from day one.
Folder structure
/[ProjectCode]/
  /01-Preconstruction/
  /02-Mobilization/
  /03-Rough-In/
  /04-MEP-Before-Cover/
  /05-Finishes/
  /06-Testing-Commissioning/
  /07-Punchlist/
  /08-As-Built/
  /Archive/
Archival policy:
- Active project: photos live in the project folder with daily sync
- Project close: full set moves to a dated archive bucket
- Retention: keep project photos for at least 10 years (longer if the contract or your insurer requires it; litigation windows on construction projects vary by state but commonly run 6–10 years)
- Backup: three copies minimum (device, cloud sync, off-site backup)
How do you verify photos before they enter the project record?
Verification is the step most small subs skip, and it's the one that costs them when a dispute surfaces 18 months later. A photo without confirmed metadata, or one that was edited in-place, may not hold up as evidence.
QA checklist before a photo enters the record:
- Required views present (wide, mid, close for each subject)
- Timestamp matches the work date in the daily report
- GPS coordinates fall within the site boundary
- Image is in focus and the subject is identifiable
- Placard or label visible in close-up shots
- No in-place edits (no cropping, filters, or adjustments to the original file)
- Uploader identity confirmed
- Reviewer sign-off logged with date and name
Tamper-detection and chain-of-custody basics:
Preserve originals. Always. Work from copies for any editing or annotation. Log any post-capture change (crop, brightness adjustment, annotation) with the editor's name, date, and reason. The OSAC standard is explicit: originals should be archived to minimize risk of alteration or loss. If your platform overwrites originals on edit, that platform is not suitable for documentation that may be used in a claim.

When GPS or timestamp data is missing:
Don't discard the photo. Instead, document the gap: note in the daily report that the device GPS was unavailable, state the location in the caption, and have the foreman sign the daily report confirming the photo was taken at that location on that date. That written attestation is your fallback chain-of-custody record.
Pro Tip: Set a reviewer SLA: all photos from the previous day's shift should be QA-checked by noon the next day. A 24-hour review window keeps the crew close enough to the work to answer questions and correct gaps before the next phase starts.
How do photos feed reports, RFIs, and document control?
A photo sitting in a folder does nothing. It earns its keep when it's attached to a record that someone acts on.
The K&K Field Photo Guide makes a point worth repeating: captions should state facts, not conclusions. Write "Conduit run at grid line B-4, 6 inches above finished ceiling, March 15, 2026" not "conduit installed correctly." The photo shows the condition; the caption labels it. Interpretation belongs in the RFI or change order narrative, not the caption.
Standard report workflow:
- Reviewer selects QA-passed photos for the subject (daily report, RFI, or change order).
- Photos attach to the work order or RFI record in the project management system.
- Each photo gets a fact-based caption: location, item, date, work status.
- The report exports with photos embedded and metadata preserved (avoid stripping EXIF on export).
- The report routes to the GC, owner, or inspector per the submittal workflow.
For change orders specifically, the photo sequence tells the story: existing condition, scope of additional work, completed work. Three photos, properly captioned, support a change order narrative better than two paragraphs of text. See how change order documentation works in practice for concrete examples.
Integration priorities:
- Link photos to asset records (equipment ID, room number, grid reference) so they surface when someone queries that asset later
- Export formats: JPEG with EXIF intact for most reports; TIFF or RAW for archival copies of high-stakes images
- BIM integration: if your GC uses a BIM platform, confirm the photo export format and metadata schema before project start so your images can attach to model elements without manual re-entry
- Document control: photos attached to submittals should reference the submittal number in the filename and caption so the reviewer can cross-reference without hunting
Who is responsible for what in the photo documentation process?
Clear ownership is what separates a workflow that runs on its own from one that depends on one person remembering to do it.
| Role | Capture | Verify | Attach to Record | Archive |
|---|---|---|---|---|
| Crew member | Takes photos per checklist | No | No | No |
| Foreman | Confirms completeness, syncs at shift end | First-pass check | Attaches to daily report | No |
| Project supervisor | Spot-checks QA | Signs off on batches | Attaches to RFIs/change orders | No |
| Office admin | No | Final QA review | Attaches to submittals | Manages archive |
| PM | No | Escalation only | Reviews for reports | Confirms retention |
Process controls that make this stick:
- Make photo fields required in the daily report form. A form that can be submitted without photos will be submitted without photos.
- Daily sync habit: foreman syncs all photos over Wi-Fi before leaving the site. This prevents permanent loss of photos captured offline and is one of the highest-impact habits to build early.
- Reviewer SLA: office admin completes QA on the previous day's batch by noon.
- Escalation path: if a required photo is missing, the foreman is notified before the daily report is marked complete.
Training quick-plan:
- Onboarding (30 minutes): walk new crew through the three-shot sequence, placard use, and the sync habit using a live device on site
- First-week check-in: supervisor reviews the first three days of photos with the foreman and corrects gaps in person
- Monthly refresher (10 minutes): review one example of a photo that helped resolve a dispute or supported a change order; show crews why the habit matters
For crew productivity tracking tied to field documentation, the same role structure applies.
Copy-paste photo plan template and trade-specific checklists
Photo Documentation Plan template
Project: _______________ Trade: _______________ PM / Supervisor: _______________
Capture windows: Preconstruction, mobilization, rough-in, MEP before cover, finishes, testing, punchlist, as-built.
Required shot types: Wide (site context), mid (work/asset), close (detail/defect with placard).
Acceptable devices: Company-issued smartphones with GPS enabled; minimum 8 MP resolution.
Metadata rules: EXIF timestamp confirmed at start of each shift; GPS active; uploader ID in filename; work order number tagged.
Filename convention: [ProjectCode]_[YYYYMMDD]_[Location]_[AssetID]_[ShotType]_[Initials]
Retention schedule: Active project folder during construction; archive at project close; retain 10 years minimum.
Sign-offs: Foreman (daily sync), supervisor (QA), PM (archive confirmation).
Trade-specific checklists
Painting:
- Surface prep condition before primer (close, with lighting to show texture)
- Primer coat coverage (mid, full wall)
- Final coat sheen at raking light (close, showing any holidays or lap marks)
- Adjacent surfaces protected (wide, showing masking)
See the painting subcontractor photo guide for additional trade-specific capture tips.
HVAC:
- Equipment nameplate (close, legible)
- Ductwork layout before ceiling close (wide + mid)
- Refrigerant line set routing (mid)
- Thermostat wiring and control board (close)
- Startup sheet on screen with unit in frame (close)
Electrical:
- Panel interior with circuit labels, cover off (close)
- Conduit routing before cover (wide + mid)
- Device rough-in with box and wire labeled (close)
- Grounding connections (close)
- Final panel schedule posted and legible (close)
Masonry:
- Existing adjacent wall conditions before work (wide)
- Mortar joint and coursing at each lift (mid + close)
- Anchor and tie placement (close)
- Control joint locations (mid)
Roofing:
- Substrate condition before membrane (wide + mid)
- Seam detail at each lap (close, with scale)
- Penetration flashing (close)
- Completed field with no visible defects (wide, from ridge or parapet)
Pro Tip: Build each trade checklist into your daily report form as a required photo field. When the form won't submit without the photo, the photo gets taken.
30-day rollout plan
- Days 1–3: Select one crew and one active project. Brief the foreman on the three-shot sequence, placard use, and sync habit. Set up the folder structure and naming convention.
- Days 4–7: Crew captures photos per checklist. Supervisor reviews daily batches and gives same-day feedback.
- Days 8–14: Office admin runs QA on each batch. Track photo completion rate (photos submitted vs. required) and sync compliance (syncs completed vs. shifts worked).
- Days 15–21: Attach verified photos to one RFI or change order. Measure time-to-attach. Identify any naming or tagging gaps.
- Days 22–28: Refine the checklist based on what was missed or duplicated. Run a 10-minute crew refresher.
- Day 30: Measure pilot metrics, iterate the template, and plan rollout to the next crew.
What should you look for in a field photo documentation tool?
The tool is not the workflow. The workflow is the workflow. But the wrong tool will break it.
Vendor evaluation checklist:
- Capture-in-form: Photos taken inside a form or daily report, not a separate camera app. This is the single most important feature because it preserves the link between the image and the record at the moment of capture.
- Metadata enforcement: The platform requires GPS and timestamp at capture and won't accept a photo without them.
- Offline sync: Crews work in basements, mechanical rooms, and steel structures with no signal. The tool must capture offline and sync when connectivity returns.
- Recovery for deleted photos: If a crew member deletes a photo from their device before sync, the platform should have a recovery path.
- Export with metadata intact: Reports and exports must preserve EXIF data. A PDF report that strips GPS coordinates is not documentation.
- API or PM integration: The tool should connect to your project management system so photos attach to records without manual re-entry.
When AI and automation help:
Auto-tagging is useful when you're managing large photo volumes across multiple crews. Duplicate detection saves office time on bulk uploads. Both features require human QA on edge cases: auto-tags misfire on unusual angles or lighting, and duplicate detection can flag intentional before/after pairs as duplicates. Use automation to reduce sorting time, not to replace the reviewer.
Pro Tip: Before committing to any platform, test the offline capture and sync on a device with airplane mode on. If photos don't sync cleanly when you reconnect, that's a workflow-breaking failure, not a minor inconvenience.
For a broader look at construction software built for subs, the same evaluation criteria apply across categories.
What are the legal and retention requirements for job-site photos in the U.S.?
Photo documentation is a legal record. Treat it like one from day one.
Retention:
Construction litigation windows vary by state, but statutes of repose for construction defects commonly run 6–10 years from substantial completion. Keep project photos for at least 10 years. If your contract specifies a longer period, follow the contract. If your insurer requires longer, follow the insurer.
Admissibility basics:
- Preserve originals. A photo that has been cropped, filtered, or adjusted in-place may be challenged as altered.
- Document chain-of-custody: who captured it, when, on which device, and who has handled it since.
- Log any post-capture edits with the editor's name, date, and reason.
- Store originals in a system that logs access and prevents overwrite.
Privacy and site access:
- Avoid capturing faces, employee ID badges, or personal vehicles in photos intended for external use.
- Follow the owner's publication rules: some contracts prohibit sharing site photos on social media or with third parties without written approval.
- For photos that include adjacent properties, confirm you have site access rights that cover the angle and subject before publishing.
This section provides general information for U.S. specialty trade subcontractors. Confirm retention periods and admissibility requirements with a qualified attorney for your specific state and contract type.
Your 30-day implementation plan, day by day
This plan assumes one crew, one active project, and a project supervisor who can spend 30 minutes a day on the pilot for the first week.
Week 1 (Days 1–7): Setup and first capture
- Write the one-page Photo Documentation Plan for the pilot project.
- Set up the folder structure and naming convention in your storage system.
- Brief the foreman: three-shot sequence, placard use, sync habit, required fields.
- Confirm GPS and EXIF timestamp are active on every crew device.
- Capture the first batch. Supervisor reviews same day and gives written feedback.
- Track: photo completion rate and sync compliance from day one.
- Fix any device or settings issues before week two.
Week 2 (Days 8–14): QA and attachment
- Office admin runs daily QA on each batch using the verification checklist.
- Attach verified photos to one daily report and one RFI or work order.
- Measure time-to-attach: how long does it take to go from verified photo to attached record?
- Identify naming or tagging gaps and correct the template.
Week 3 (Days 15–21): Reporting and refinement
- Build one owner update or progress report using only verified, captioned photos.
- Run a 10-minute crew refresher: show one photo that helped and one that didn't, explain why.
- Check QA pass rate: what percentage of submitted photos pass verification without rework?
Week 4 (Days 22–30): Measure and scale
- Calculate pilot metrics: photo completion rate, sync compliance, QA pass rate, time-to-attach.
- Iterate the checklist based on what was missed, duplicated, or flagged.
- Present results to the PM or owner-operator: show the before/after on report build time and photo completeness.
- Plan rollout to the next crew with the refined template.
Pro Tip: The metric that matters most in week one is sync compliance, not photo quality. A crew that syncs every shift and takes mediocre photos is easier to coach than a crew that takes great photos and loses them on a device.
For masonry daily production report examples that pair photos with production data, the same pilot structure applies.
How does photo documentation connect to BIM and project management platforms?
Most specialty trade subs don't own or manage the BIM model. The GC does. Your job is to make sure your photos can attach to model elements without requiring your crew to learn new software.
Before project start, ask the GC three questions: What photo format do you accept for model attachment? What metadata fields does your platform require? Can photos be linked to elements by asset ID or grid reference?
If the GC uses a platform that accepts photos via API, confirm your field tool can push photos with the required metadata fields intact. If the GC requires manual upload, build that step into your office admin's weekly task list and make sure the naming convention matches the GC's asset ID schema.
For project management integration, the priority is the same: photos should attach to records automatically at capture, not manually after the fact. A submittals workflow that includes photo attachments at each approval stage reduces back-and-forth with the GC and creates a cleaner audit trail.
The practical floor for any integration: your photos must be exportable with EXIF intact, named consistently, and linked to a work order or submittal number. That's enough to satisfy most GC document-control requirements without a full API integration.
What most field managers get wrong about photo documentation
The conventional wisdom says the problem is volume: crews take too few photos. That's real, but it's not the root cause. The root cause is that crews don't know which photos matter and why.
A foreman who has never seen a photo used in a dispute doesn't understand why the MEP-before-cover shot is worth more than ten progress shots of finished drywall. The training fix is not a longer checklist. It's one concrete example: show the crew a change order that got approved because of a single conduit-routing photo, or a claim that got denied because no one photographed the existing water damage before the plumbing sub started work.
The second pitfall is the personal camera roll. A crew member who uses their personal phone and never syncs to the project system has broken the metadata linkage. The photo exists, but it's not in the record, it's not searchable, and it may not have the GPS coordinates that place it on the site. The fix is simple: require capture inside the project form, not the device gallery. Integrated capture-in-form workflows keep photos attached to records with automatic timestamps and geolocation, and provide recovery paths if a device photo is deleted before sync.
The third pitfall is treating verification as optional. A batch of unreviewed photos attached to a submittal is not documentation. It's noise. The reviewer's job is not to admire the photos; it's to confirm that the required evidence is present, legible, and linked to the right record before it leaves the site.
Subascent runs this workflow for specialty trade subs
Subascent is built specifically for specialty trade subcontractors, and the field photo documentation workflow described in this guide maps directly to what the platform does.

Capture-in-form is built in: crews take photos inside daily reports and work orders, so every image links to a project record with timestamp and GPS at the moment of capture. Metadata fields are enforced, not optional. The CrewTrack mobile app handles offline capture and syncs when the crew reconnects, so photos taken in a basement or a mechanical room don't disappear. Verified photos attach to RFIs, change orders, and submittals without re-entry. Exports preserve metadata. And the whole system connects to QuickBooks so your office isn't running two separate workflows.
The 30-day pilot is the right starting point. Subascent provides the template, the setup support, and the measurement framework so you can show results at day 30 and scale with confidence. Subascent and see how the workflow runs on one crew before you commit to anything larger.
Sources
- NASA Imagery Procedure and Metadata Standard v2.0
- Guidelines for Evidence Photography in a Controlled Setting (SWGDE)
- Digital Imaging Workflow for Treatment Documentation (Library of Congress)
- Field Photo & Project Update Guide | K&K